About Recipes Restaurants FAQ My Kitchen My Kitchen

Wednesday, August 26, 2009

Why we cook: A note before vacation

The clock is ticking until I board the plane for two glorious weeks of vacation. I have no new recipe to share (my August DB challenge is all ready to post if I can find a computer in Spain). Instead, I have a few thoughts on a recent baking endeavor...

Imagine this: 90+ degrees outside; humidity over 80%. My hair tied back in a frizzy mess as I crank the oven to 400 and get started on Mom's birthday cake. The chocolate buttercream can come out of the fridge for just minutes at a time or I risk having chocolate soup on my hands. 6 layers of cake go into the oven, one at a time. As I pull one of them out, a blast of heat comes from the oven, burning my eyelashes. Not a pleasant feeling, that's for sure.

So why bother? Why do so many cooks labor though conditions like this when there's a bakery just around the corner?

A few hours later, cake at a safe room temperature for buttercream, I light the candles and watch as my little niece nearly scrambles onto the table to help grandma blow them out. The fascination in her eyes is something only a child can possess. But wait, it gets better.

The fork is pushed aside as she takes one finger to scoop some chocolate frosting. Into the mouth it goes and then two fingers reach out for more. Soon she's using her whole hand, smiling as bright and wide as can be...

This is why we cook. I know I forget sometimes, so my thanks go to my two year-old niece for reminding me. I'll make her chocolate cake in any weather as long as that smile comes with it.

Thursday, August 20, 2009

Farmer's market find: Blackberries

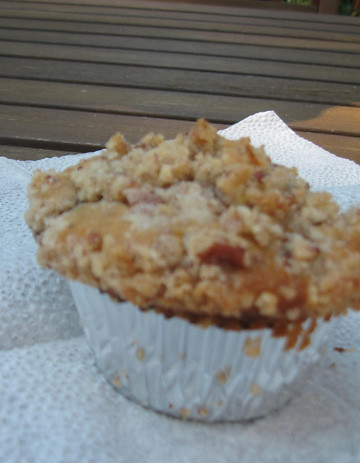
Juicy, plump blackberries! Who could resist them on a sunny summer morning at the local farmers' market? Not me! I happily paid the farmer and poured them into a bag, carefully carrying them as I rode my bike home. I rinsed them, nibbled a few, then started making muffins!

The muffin batter is pretty standard with buttermilk, flour and all the rest. A little lemon zest brightens the flavor and a crunchy pecan-sugar coating makes these babies irresistible. And they're simply chock full of fruit. So they're healthy, right?


Blackberry muffins


For the topping:

  • 1/3 cup sugar
  • 3 Tbsp. flour
  • Grated zest of half a lemon
  • 2 Tbsp. unsalted butter, melted
  • 1/2 cup pecans, finely chopped

For the muffins:

  • 2 cups flour
  • 3/4 cup sugar
  • 2 tsp. baking powder
  • 1/2 tsp. baking soda
  • 3/4 tsp. ground cinnamon
  • Grated zest of 1/2 a lemon
  • 1/4 tsp. salt
  • 1 egg, beaten
  • 5 Tbsp. unsalted butter, melted
  • 1 cup buttermilk
  • 2 cups blackberries

Preheat oven to 375F. Line 12 muffin cups with liners or butter them.

To make the topping, mix together the sugar, flour and lemon zest. Add the butter and mix until combined. Mix in the pecans and set aside.

To make the muffins, combine the dry ingredients, including the zest. Add the wet ingredients and mix until just combined. Gently fold in the blackberries, trying not to break them. Don't overmix.

Divide the batter among the 12 muffin cups. Sprinkle the topping over them.

Bake for 25-30 minutes or until a toothpick comes out clean. Cool in the pan for 10 minutes on a wire rack.

NOTE: you could very easily substitute other berries in these. Blueberries would be excellent with the lemon zest as would raspberries. Or try a mix of berries!

Tuesday, August 18, 2009

Elegant fish: Curry-infused cod with braised leeks

Mom always told me to read a recipe thru completely before starting... I didn't listen. I typically scan the list of ingredients and go on my merry way. I must say it has caused some rather tasty mishaps over the years. On other occasions, it's created some undue stress in the otherwise peaceful haven that is my kitchen. On Saturday, it was a little bit of both.

I decided to try the Curry-Infused Cod with Braised Leeks and Crispy Potatoes from Cooking with Curtis by Curtis Stone. I love leeks, I love curry, and cod was on special. Perfect! So on Saturday at about 3 p.m. I decided to get things prepped. I read the first few lines of the recipe and realized I was supposed to infuse the oil for 24 hours and then marinate the fish for 12. I had about 4 hours total, maybe 5 if we ate a little late. Hmmmm...

So, I improvised. I took a few shortcuts and I must say it turned out wonderful. Maybe not what Curtis intended, but I'll make it again and probably repeat my blunders - I might cut back a little on the spices, we shall see. What follows is my version... (by the way, the smashed potatoes are super fun to make!)

Curry-infused Cod with Braised Leeks and Crispy Potatoes
adapted from Cooking with Curtis
  • 1 tsp. turmeric
  • 1 tsp. ground cumin
  • 1 tsp. paprika
  • 1 tsp. ground coriander
  • 1 tsp. fennel seeds, ground
  • 2 tsp. madras curry powder
  • 1/3 cup grapeseed oil
  • 2 portions fresh cod, skinless
  • olive oil
  • 1 carrot, peeled and cut into thin strips
  • 1 celery stalk, cut into thin strips
  • 1 onion, diced
  • 2 garlic cloves, minced
  • 4 leeks, white and light green parts only, trimmed close to the root so they hold together, then quartered lengthwise
  • 1 1/4 cups chicken stock
  • 12 baby new potatoes
  • 2 Tbsp. unsalted butter, cold
  • salt and pepper to taste

Combine all the spices in a small pan and heat until fragrant. Stir in the oil, then let it come to room temperature. Strain it to get and large spices out. Pour it into a shallow dish and add the fish, turning to coat. Cover and refrigerate for 3 hours.

Bring a pan of water to a boil. Add the potatoes and cook for about 15 minutes until just cooked. Strain and set aside to cool slightly. Once cooled, lightly smash each (this is wicked fun) with the bottom of a saucepan. You want to break the skin, but the smashed potato should stay in one piece.

Heat 2 Tbsp. olive oil in a pan and add the carrot, celery, onion and garlic. Sweat for about 3 minutes then add the leeks and stock. Simmer until the veggies are tender. Remove the carrots, leeks and celery to a plate and keep warm. Swirl the cold butter into the pan and let it reduce for a few minutes.

Heat a frying pan with a little olive oil. Add the potatoes, sprinkling them with salt and pepper to taste. Fry on both sides until brown and crispy.

Heat a third pan, preferably non-stick, and add the fish, cooking a few minutes on each side until just cooked. Sprinkle it with a little salt, too. My fish was thick so it took 4-5 minutes a side. Thinner pieces will only need 2-3 per side. A toothpick stuck in the fish should encounter no resistance.

To finish the sauce, puree it with an immersion blender.

To serve, arrange some of the vegetables on the plate. Top each with a piece of fish. Pile some potatoes on the side then pour the sauce around it.

Serves 2. Can easily be doubled or tripled for more people.

Monday, August 17, 2009

It's Greek to me! Greek pepper and onion pie

Last night, Mom came over for supper. I was thumbing through the newest addition to my cookbook collection, Vefa's Kitchen, and was inspired to make Greek. We haven't been to Pithari in awhile, so it was a nice change. I decided on mixed souvlaki with chicken and pork and a Bell pepper and onion pie. This was huge for 3 of us so Mom got leftovers and Jeff and I will be having it again.

If phyllo intimidates you, this is a great recipe to give it a try. It's simple and rustic and comes together quickly. I was also great to serve company because all the work is done ahead so it can bake while you visit. And with fresh seasonal peppers at the farmers' market, who could resist? Have it on its own for a vegetarian dinner or serve with simple grilled meat and tzatziki.

Greek Bell Pepper and Onion Pie

10 sheets of phyllo, thawed
1 each large red, yellow and green bell peppers (3 total), cut into thin strips
2 large onions, thinly sliced
4 scallions, chopped
2/3 cup + 4 Tbsp. Extra virgin olive oil
Salt and pepper
2 eggs, lightly beaten
1/3 cup breadcrumbs
8 oz. Feta, crumbled
1/4 cup chopped fresh parsley
1 large tomato, sliced

Preheat oven to 350F.

If needed, trim the phyllo sheets to squares a bit larger than your baking dish. Brush a round baking dish with olive oil. Lay one sheet of phyllo in the dish then brush with olive oil. Let the edges hang over. Lay another sheet on top, rotating it a bit so the corners don't line up with the corners of the first. Repeat until you have 5 sheets lining the bottom of the pan.

In a large saute pan over medium high heat, heat 4 Tbsp. Olive oil. Add the peppers, onions and scallions. Cook until just softened. Remove from heat. Add the parsley, eggs, breadcrumbs, salt and pepper to taste and crumbled feta. Stir to combine. Pour into prepared pan and smooth out the top. Lay the tomato slices over the top.

Cover with a layer of olive oil, this time tucking the edges in. Brush with olive oil. Repeat until you have 5 layers on top. Brush the top with olive oil and fold in the corners from the phyllo sheets on the bottom of the pan to create the edge of the crust. Score the pie for 8-10 servings.

Bake for about 50-55 minutes, until golden and crisp. Let cool for about 5-10 minutes before serving.


Friday, August 14, 2009

Daring Cooks: Spanish rice with Cuttlefish!

This month’s Daring Cooks’ Challenge came from Olga from Las Cosas de Olga and Olga’s Recipes She chose a delicious Spanish recipe, Rice with mushrooms, cuttlefish and artichokes by José Andrés, one of the most important Spanish Chefs at the moment.The recipe is from his US TV show Made in Spain.

A quick note about my lack of photos: I sit here blogging on my laptop because my desktop, where ALL my pictures are stored, has a nasty virus and won't let me on the internet. So until that gets sorted, you'll have to imagine my yummy rice!

How appropriate that we had a Spanish dish this month! It whetted our appetites for our fast-approaching trip to Spain. (Yes, we do plan vacations around food... and drink... Can you say "Rioja"? But I digress...

And what a good recipe it was! After many stops, I finally found baby cuttlefish. I also added some shrimp, chorizo, chicken, and a little lobster! YUM! I couldn't find the Spanish rice called for but Whole Foods carried a short grain brown rice. It gave the dish a nutty texture so common with brown rice, not to mention all of the health benefits. To make sure the chicken was super-tender, I sprinkled it with salt, pepper and smoked Spanish paprika, then browned it before letting it simmer with the rice.

A fabulous dish - and very adaptable. Use whatever meat or seafood suits you. Throw in some veggies and you're on your way to Spain... Oh wait, I'm on my way... can you tell I'm excited!? We leave in just over a week, so check back to see where we're headed.

Rice with mushrooms, cuttlefish and artichokes

Cooking time: 45 minutes

Ingredients (serves 4):

  • 4 Artichokes (I used 1 can drained and quartered)
  • 12 Mushrooms (button or Portobello)
  • 1 or 2 Bay leaves (optional but highly recommended)
  • 1 glass of white wine
  • 2 Cuttlefish (you can use frozen cuttlefish or squid if you don’t find it fresh)
  • “Sofregit” (see recipe below)
  • 300 gr (2 cups) Short grain rice (Spanish types Calasparra or Montsant are preferred)
  • Water or Fish Stock (use 1 ½ cup of liquid per ½ cup of rice)
  • Saffron threads (if you can’t find it or afford to buy it, you can substitute turmeric or yellow coloring powder)
  • Allioli (olive oil and garlic sauce, similar to mayonnaise sauce) - optional

Directions:
1. Cut the cuttlefish in little strips.
2. Add 1 or 2 tablespoon of olive oil in a frying pan and put the cuttlefish in the pan.
3. If you use fresh artichokes, clean them and cut into eights (or quarters for smaller ones)
4. Clean the mushrooms and cut them in fourths.
5. Add a bay leaf to the cuttlefish and add also the artichokes and the mushrooms.
6. Sauté until we get a golden color in the artichokes.
7. Put a touch of white wine so all the solids in the bottom of the get mixed, getting a more flavorful dish.
8. Add a couple or three tablespoons of sofregit and mix to make sure everything gets impregnated with the sofregit.
9. Add all the liquid and bring it to boil.
10. Add all the rice. Let boil for about 5 minutes in heavy heat.
11. Add some saffron thread to enrich the dish with its flavor and color. Stir a little bit so the rice and the other ingredients get the entire flavor. If you’re using turmeric or yellow coloring, use only 1/4 teaspoon.
12. Turn to low heat and boil for another 8 minutes (or until rice is a little softer than “al dente”)
13. Put the pan away from heat and let the rice stand a couple of minutes.

Sofregit
(a well cooked and fragrant sauce made of olive oil, tomatoes, garlic and onions, and may at timesdifferent vegetables such as peppers or mushrooms)


Cooking time: aprox. 1 hourIngredients:
· 2 tablespoons of olive oil
· 5 big red ripe tomatoes, chopped
· 2 small onions, chopped
· 1 green pepper, chopped (optional)
· 4 or 5 garlic cloves, chopped
· 1 cup of button or Portobello mushrooms, chopped (optional)
· 1 Bay leaf
· Salt
· Touch of ground cumin
· Touch of dried oregano


Directions:
1. Put all the ingredients together in a frying pan and sauté slowly until all vegetables are soft.
2. Taste and salt if necessary (maybe it’s not!)

Allioli (Traditional recipe)Cooking time: 20 min aprox.Ingredients:
· 4 garlic cloves, peeled
· Pinch of salt
· Fresh lemon juice (some drops)
· Extra-virgin olive oil (Spanish preferred but not essential)

Directions:
1. Place the garlic in a mortar along with the salt.
2. Using a pestle, smash the garlic cloves to a smooth paste. (The salt stops the garlic from slipping at the bottom of the mortar as you pound it down.)
3. Add the lemon juice to the garlic.
4. Drop by drop; pour the olive oil into the mortar slowly as you continue to crush the paste with your pestle.
5. Keep turning your pestle in a slow, continuous circular motion in the mortar. The drip needs to be slow and steady. Make sure the paste soaks up the olive oil as you go.
6. Keep adding the oil, drop by drop, until you have the consistency of a very thick mayonnaise. If your allioli gets too dense, add water to thin it out. This takes time—around 20 minutes of slow motion around the mortar—to create a dense, rich sauce.

Monday, August 10, 2009

Brown-butter toffee blondies: sticky, chewy, yummy!

Yesterday morning was rainy and gloomy and not too hot so I decided to turn on the oven. By the time I did, the humidity had kicked in, but I pushed ahead anyway. I made a fresh batch of granola and then got to work on these brown butter toffee blondies. They get a nice crust on top and the middle is chewy and moist. Big chunks of walnuts add even more texture. They're definitely sweet, but the brown butter gives them a much deeper flavor. They come together pretty quickly, too, although I'm always amazed how long the butter takes to get to the color I like.

Brown-Butter Toffee Blondies
adapted from Martha Stewart Cookies
  • 2 1/2 sticks unsalted butter, plus more for the pan
  • 2 1/4 cups flour, plus more for pan
  • 1 1/2 tsp. baking powder
  • 1 1/2 tsp. salt
  • 2 cups packed dark brown sugar
  • 1/2 cup granulated sugar
  • 3 eggs
  • 3 tsp. vanilla extract
  • 1 cup walnuts, broken into bite-sized chunks
  • 1 1/2 cups toffee bits (with or without chocolate, your preference)

In a pan over medium heat, cook the butter until it's golden brown (see photo below). Remove from heat and allow to cool.

Preheat oven to 350F. Butter a 9x13 baking dish; line the bottom with parchment then butter and flour the parchment. Shake off any excess flour.

Whisk together flour, baking powder and salt. Set aside.

In the bowl of an electric mixer, combine both sugars and the butter. Stir until combined. Add the eggs and mix on medium-high speed until light and fluffy, about 3 minutes. Add the vanilla and beat to combine. Add the flour mixture, walnuts and toffee bits and mix until combined. Pour into prepared pan.

Bake about 40 minutes or until a cake tester comes out clean. Allow the blondies to cool in the pan for a little while then loosen the edges with a sharp knife. Turn them out onto a cutting board and peel off the parchment. Store in an airtight container.

Tuesday, August 4, 2009

Back to Morocco: Summer Lamb Tagine with Zucchini, Red Peppers and Mint

Maybe it's the delightfully fun look of the tagine on my stove or maybe it's the bold flavors of Moroccan food, but lately I can't get enough! I tried another tagine from Basan's cookbook. As usual, I made some modifications and we still found it a bit blah so the recipe below is what I would've done or what I will do next time. Basically I've added a couple of things and increased the amount of spices and changed the technique a little... all in the name of flavor - big Moroccan flavor. As with the other tagines I've created, a heavy pot will work just fine, too!


Also, the cooking time for this one makes it challenging for a weeknight. I prepped everything in the morning. I had my tagine out, meat cubed, aromatics chopped and spices all measured. All I had to do was cut some mint while the oil heated. Then while it cooked, I headed out to do some gardening (a short adventure because the mosquitoes got me...).

Tagine of Lamb with Zucchini, Mint and Bell Peppers
  • 1 half boneless lamb leg, trimmed of fat and cut into bite-sized pieces
  • 4 Tbsp. Olive oil
  • 1 large onion, diced
  • 2 1/2 tsp. cumin seeds
  • 2 1/2 tsp. coriander seeds
  • 1 Tbsp. fresh chopped mint, plus 2 Tbsp. for garnish
  • Salt and pepper
  • 1 1/2 inch piece fresh ginger, peeled and chopped
  • 5 cloves of garlic, minced
  • 2 zucchini, cut on a diagonal into thick slices
  • 1 large tomato, chopped
  • 1 large red bell pepper, cut into large strips
  • juice of half a lemon

Lightly crush the spices with a mortar and pestle.

Combine the lamb, spices, 1 Tbsp. mint, garlic and ginger with 2 Tbsp. olive oil in a large bowl. Mix well and refrigerate for a couple hours.

Heat the remaining 2 Tbsp. olive oil in a tagine or large heavy pot. Add the onion and cook until soft. Add the meat and spices. Season with salt and pepper. Allow the meat to brown a little and then add just enough water to almost cover the meat. Bring to a boil, then reduce the heat, cover and simmer for about 90 minutes. Skim off any fat that rises to the top.


Add the vegetables and cover again. Let cook about 15 minutes longer until vegetables are crisp tender. Sprinkle with the lemon juice. Taste to see if more salt and pepper are needed.

Sprinkle with remaining fresh mint. Serve with couscous.

Serves 4.


Monday, August 3, 2009

Restaurant review: Splash of Thai in Westfield

Located on the south side of Westfield, Splash of Thai has been a favorite of ours since we moved into the area three years ago. Its modern decor is stylish and friendly service makes every visit a pleasure.

On the menu, you'll find all of the classic Thai dishes, including curries, noodles and more. Be sure to check out the daily specials for the chef's freshest creations.

For starters, we love the fresh rolls. Chilled rolls of shrimp, vermicelli, vegetables and fresh mint are wrapped in a rice paper and served with crushed peanuts and a sweet dipping sauce. Another winner is the crispy duck salad. A flaky, light wonton bowl is filled with fresh lettuce, apple slices, red onion, and strips of crispy duck then tossed in a spicy-sweet dressing. The grilled beef salad is equally good. The calamari salad can be a bit chewy.

Other winning appetizers include satay, curry puffs and an occasional special of fried calamari and shrimp, both lightly battered and served with a sweet plum dipping sauce.

Move onto the entrees and there's plenty to choose from. Our favorites are green curry with chicken (beef or shrimp are also available) and Mussaman curry with beef. The green curry is spicy and sweet, and full of tender white meat chicken and loads of fresh veggies including bok choy, Thai eggplants, peppers, bamboo shoots and more. Served in a beautiful white bowl with a side of steamed rice, it'll warm you and fill you! The Mussaman curry is less spicy and includes potatoes, plenty of tender beef, chunks of tomato, peanuts and fresh avocado.

For noodle lovers, Pad Thai is outstanding and the drunken noodles are spicy and full of fresh meat and seafood.

Splash of Thai also offers a wide range of fish and seafood dishes. The most outstanding we've tried is the Three flavor Red Snapper. When ordering, select the whole fish for dramatic presentation. The whole fish is fried in a very light batter and served with a spicy tamarind sauce. Always cooked perfectly, this is one of my all-time favorite fish dishes.

For dessert, Splash of Thai specializes in made-to-order chocolate souffle.

On all but our most recent visit, we've opted to eat in, but take-out is available. Portions are as big as what you get in the restaurant and the food was ready and hot when they said it would be.

Note that the restaurant is BYOB, so bring your favorite bottle to enjoy with your meal. They also have a location in Somerville.
Splash of Thai on Urbanspoon
Related Posts with Thumbnails