






Wednesday, January 25, 2017
white plate blank slate
After a long break from Ladyberd's Kitchen, I'm blogging (and cooking) again over at white plate blank slate. Stop by the new site for new recipes, photos and blogging tips.


Monday, June 8, 2015
Lobster BLTs

It's been 19 months since my last post and a lot has changed. My amazing girls are now 2 and a half (cant forget the half) and almost 5! I've moved to a new house and just completed my new kitchen. The girls love helping me in the kitchen - just last night tiny one helped make me a turkey sandwich to take to the office for lunch. I showed her how to take a slice of turkey and lay it on the bread, then watch as she grabbed a slice, rolled it into a ball, mashed it in her tiny hands a few times, then squished it onto the bread... good thing she washed her hands first... but boy was she proud of herself!
As they get older, I get a bit more sleep and a bit more time to myself - which hopefully means time to get back to my blog. I've been cooking all along, just not as fancy and I haven't had time to take photos and write posts...
Perhaps I should re-title this Ladyberd and Baby birds in the kitchen... First things first though: a post.
One of the things I welcome most about summer are dropping prices on lobster. This past Memorial Day, I made a new favorite: Lobster BLTs with Saffron aioli. Steam and shell the lobsters the night before (or cheat and have your market steam them for you). Then this becomes a quick dinner with some steamed corn or potato salad.

Lobster BLTs
adapted from Lobster! by Brooke Dojny
1 tsp. white wine vinegar
pinch saffron threads
3 Tbsp. mayonnaise
meat from 2 1-1/4 pound lobsters
8 strips of cooked bacon
Several leaves crisp lettuce (like Romaine)
1 tomato, sliced
Sliced avocado (optional)
8 thick slices challah
Butter
Mix the saffron and vinegar in a small dish and let sit for a few minutes so the flavors blend. Stir in the mayonnaise.
Spread one side of each piece of bread with butter and toast in a pan. when golden brown, remove from pan and place toasted side down on a plate.
Pile one fourth of the lobster on each of 4 pieces of the bread. top with two slices of back, lettuce, tomato and avocado (if using). Spread some of the aioli on the untoasted side of the remaining four slices of bread and put on top of each sandwich.
Serves 4.
Monday, November 4, 2013
Gnocchi with sausage and leeks
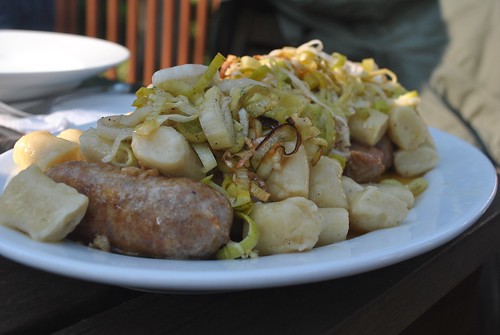
My kitchen broke. The dog ate my cookbooks... Those are about the best excuses I can come up with for my lengthy absence from this blog that was once such a big part of my life. They're not even good excuses. Heck, I don't even have a dog (if I did, my husband would probably be pretty happy if he ate a few of my cookbooks). But a lot has happened since my last post in April. My tiny one turned one... and started sleeping through the night (most of the time). My job changed. Then changed again. My manager changed. My husband's job changed.
Through it all, I have been cooking - a lot. Fortunately we are moving past the phase of baby food and I can serve one meal to my whole family at least a few times a week. This may sound ridiculous to the childless, but all you moms know exactly how monumental this is. Last night's dinner was Polish: kielbasa, pierogies and sauerkraut. And you know what?? Both kids ate kielbasa and pierogies. It made my day. These are the small victories that mean so much to working moms...
I have a stockpile of photos and recipes from the last few months, so it's time to get back to blogging. This one is a highlight - from a cookbook Mom gave me a few months back...
Note well: the gnocchi need to be started a day ahead so plan accordingly!
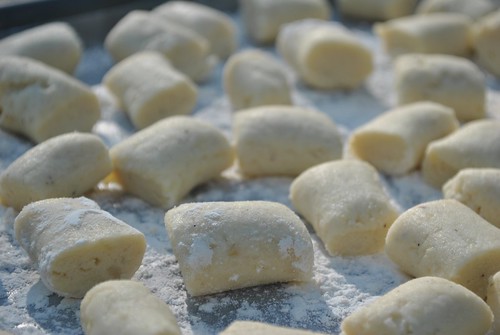
Gnocchi with sausage and leeks
Adapted from Fabio's Italian Kitchen by Fabio Viviani
2 leeks
1 Tbsp. butter
2 Tbsp. minced garlic
6-8 Sweet Italian sausages
1 c. dry white wine
2 Tbsp. olive oil
Salt and pepper
1 recipe potato-ricotta gnocchi (follows)
Good quality EVOO for drizzling
Parmigiano-Reggiano
Preheat oven to 375F.
Clean the leeks well and slice pale green and white parts into thin rounds.
Heat the butter in a saute pan over medium heat and brown the sausages on all sides. Add the wine and reduce. While the wine is reducing, toss the leeks with the olive oil and season to taste with salt and pepper. Spread the on a baking sheet and roast for 15 minutes.
Once the wine has reduced and leeks are roasted, drop gnocchi in a pot of salted boiling water. Remove gnocchi as soon as the first ones rise to the top. Add to the pan with the sausage mixture and toss to coat. Transfer to a serving platter and top with the leeks, a drizzle of good Extra-virgin olive oil and some shaved Parmesan.
Potato-ricotta gnocchi
6 medium baking potatoes
1/2 a whole nutmeg, grated (I used less!)
1 Tbsp. salt, plus pepper to taste
1 egg yolk
1 cup ricotta cheese
1 cup semolina flour
2 cups flour
Preheat oven to 425F.
Bake the potatoes for an hour until they are crispy on the outside and fluffy on the inside. Cool for a couple hours then scoop out the insides. Mash until very smooth using a fork or potato ricer.
Add the nutmeg, salt, pepper to taste, egg yolk and ricotta. Mix to combin and refrigerate overnight, covered.
The next day, spread the semolina in an even layer on a baking tray.
Place potato mixture in the bowl of a stand mixer and add the flour on low-medium speed. Once the mixture has come together, remove it from the bowl and cut into fist-sized pieces.
Roll each ball into a cigar shape and cut into 1-inch pieces. Place on the baking tray and then refrigerate for 20-30 minutes to set. Cook as noted in recipe above.
Tuesday, April 23, 2013
Salt Lick Green Onion and Cheese Souffle
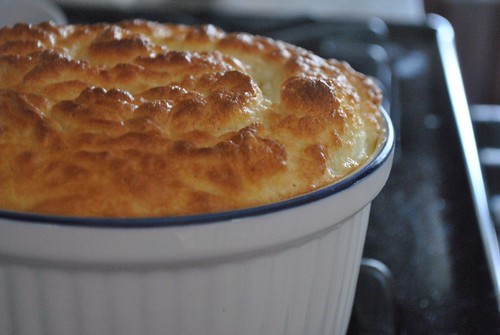
My last post was on the eve of my second daughter's birth: seven months and twelve days ago. It's amazing how much can change in so little time. Hurricane Sandy left her mark when little one was just seven weeks old. There was Newtown and more recently the Boston bombings... I was on maternity leave for nearly four months and have now been back at work for nearly four.
And it is work that led me to this post.
More specifically, it is work that led me to the Salt Lick.
Since returning to work, I've had three business trips - two to Texas and one to Michigan. The Michigan trip was a snowy disaster and one trip to Texas found me locked in my hotel room with a stomach bug. (The saving grace was a nice dinner when I recovered out with my two favorite people from work.) But the other trip to Texas was for a team meeting and I have a great team. These are people I would actually choose to hang out with if work hadn't thrown us together by chance. Needless to say, it made for some fun nights.
On one of those nights, the boss, a true Texas carnivore (not sure green is in his vocabulary), chose to take the team for some finger-licking good BBQ at the Salt Lick. I had heard of the Salt Lick during a recent season of Top Chef, so my little eyes lit up when he mentioned it. I had decided to buy the cookbook before we even arrived (my teammates laughed at my eagerness, but then several of the guys decided to tote home a copy for their wives!)
The barbecue was good - really good. Especially the ribs washed down with more than a couple pitchers of Shiner Bock. If I find myself in Austin again, I'm going back for more. In the meantime, I'll content myself with the book.
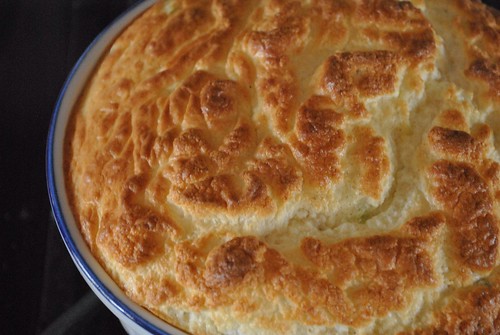
Green Onion and Cheese Souffle
from the Salt Lick Cookbook by Scott Roberts and Jessica Dupuy
2 Tbsp. unsalted butter
3 Tbsp. all-purpose flour
1 cup milk, room temperature
½ cup grated Gruyère cheese
½ cup grated Parmigiano-Reggiano cheese
6 oz. pancetta, finely chopped (optional)
1 – 2 bunches green onions, cleaned and sliced on the bias into ½” slices
2 tsp. Dijon mustard
4 egg yolks
salt and pepper to taste
8 egg whites
1 tsp. cream of tartar
Pre-heat the oven to 375º F and butter a 1½ qt. soufflé mold.
Pre-heat a medium saucepan over medium high heat. Add the butter and melt until frothy. Add the flour, reduce the heat to medium, and cook, stirring constantly for 2 to 3 minutes, creating a roux.
Remove the pan from the heat and add the milk, whisking vigorously. Return the pot to the heat and bring this mixture to a boil so that the sauce will thicken. (This is a basic white sauce.)
Again, remove the pan from the heat and add the grated cheeses, stirring well to melt.
In a large skillet, cook the chopped pancetta (if using) over medium heat. When pancetta is fully cooked and a little crispy, add the green onions to the pan and sauté briefly. If you are not including the pancetta, simply sauté the green onions in a tbsp. of butter.
Add the green onions, mustard, and egg yolks to the cheese sauce. Taste this mixture and season with salt and pepper. (Be sure to season well or over-season slightly, since this mixture will be diluted by the egg whites later.) Let this mixture cool completely.
Whisk the egg whites and cream of tartar in a copper bowl to soft peak stage. In three stages, carefully fold the egg whites into the soufflé base. Transfer the mixture to a buttered 1½ qt. soufflé mold. Bake at 375º F for 30 minutes, or until risen and lightly browned on top. The soufflé should jiggle only slightly when finished.
Tuesday, September 11, 2012
Bucatini All'Amatriciana with Spicy Smoked Mozzarella Meatballs
Well, this is it. Tomorrow, I officially become a mother of 2. This time around, it's quite different. I feel better prepared, ready for the challenge and joy of having a newborn. I'm not entirely sure how my 2-year-old will respond, but I think she'll do ok once she comes to grips with the fact that mommy can't pick her up for awhile.
There's one thing for sure: my freezer is stocked: sauces, chili, burgers, quick meals. (So the blogging may suffer for a bit...) Last time around, I didn't take this step. I thought I'd have time to cook - silly, silly, delusional me.
I'm still working but my last meeting ends in 90 minutes. Come 5 o'clock, I'm off til the New Year. Seems far off, but it'll no doubt fly by as I watch little peanut grow and grow and spend some extra time with big sister.
Hopefully I'll be back in the kitchen soon. In the meantime, here's a new favorite that sounds difficult but is actually pretty east to make. Excuse the less than stellar photos...
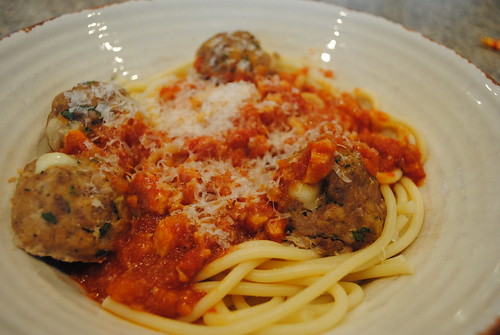
Bucatini All'Amatriciana with Spicy Smoked Mozzarella Meatballs
Adapted from Giada at Home by Giada de Laurentiis
All'Amatriciana Sauce:
2 tablespoons olive oil
6 ounces pancetta, diced
1 yellow onion, finely chopped
2 garlic cloves, minced
Pinch crushed red pepper flakes
1 (14-ounce) can crushed tomatoes
1/2 teaspoon kosher salt, plus more for seasoning
1/2 teaspoon freshly ground black pepper, plus more for seasoning
1/2 cup grated Pecorino Romano
Meatballs:
1 small (6-ounce) onion, grated
1/2 cup chopped fresh flat-leaf parsley, plus 1/4 cup
2/3 cup grated Parmesan cheese, plus 1/4 cup
1/3 cup Italian-style bread crumbs
1 large egg
2 tablespoons ketchup
3 garlic cloves, minced
1/4 teaspoon crushed red pepper flakes
1 teaspoon kosher salt, plus more for seasoning
1/2 teaspoon freshly ground black pepper, plus more for seasoning
8 ounces ground beef
8 ounces ground veal
2 ounces smoked mozzarella cheese, cut into 16 (1/2-inch) cubes
1 pound bucatini or other long pasta
For the sauce: In a large heavy skillet, heat the oil over medium heat. Add the pancetta and cook, stirring constantly, until golden brown, about 5 to 7 minutes. Using a slotted spoon, remove the pancetta and reserve. Add the onion and cook for 5 minutes. Stir in the garlic and red pepper flakes and cook until fragrant, about 30 seconds. Add the tomatoes, 1/2 teaspoon salt, 1/2 teaspoon black pepper, and the cooked pancetta. Simmer, uncovered, over medium-low heat until the sauce thickens, about 15 minutes. Stir in the cheese and season with salt and pepper, to taste.
For the meatballs: Position an oven rack in the lower 1/3 of the oven. Preheat the oven to 400 degrees F. Line a baking sheet with parchment paper.
In a large bowl, combine the onion, 1/2 cup parsley, 2/3 cup Parmesan, bread crumbs, egg, ketchup, garlic, red pepper flakes, 1 teaspoon salt, and 1/2 teaspoon pepper. Add the beef and veal. Using your hands, combine all ingredients gently but thoroughly. Shape the meat mixture into 16 (1 1/2-inch-diameter) meatballs and place on the prepared baking sheet. Make a hole in the center of each meatball and place a cube of mozzarella inside. Reform the meatball so that the mozzarella is completely covered with the meat mixture. Bake the meatballs for 15 minutes until cooked through.
Bring a large pot of salted water to a boil over high heat. Add the pasta and cook until tender but still firm to the bite, stirring occasionally, about 8 to 10 minutes. Drain and place in a large serving bowl. Add the meatballs and sauce. Toss gently and season with salt and pepper, to taste. Sprinkle with the remaining parsley and Parmesan.
There's one thing for sure: my freezer is stocked: sauces, chili, burgers, quick meals. (So the blogging may suffer for a bit...) Last time around, I didn't take this step. I thought I'd have time to cook - silly, silly, delusional me.
I'm still working but my last meeting ends in 90 minutes. Come 5 o'clock, I'm off til the New Year. Seems far off, but it'll no doubt fly by as I watch little peanut grow and grow and spend some extra time with big sister.
Hopefully I'll be back in the kitchen soon. In the meantime, here's a new favorite that sounds difficult but is actually pretty east to make. Excuse the less than stellar photos...
Bucatini All'Amatriciana with Spicy Smoked Mozzarella Meatballs
Adapted from Giada at Home by Giada de Laurentiis
All'Amatriciana Sauce:
2 tablespoons olive oil
6 ounces pancetta, diced
1 yellow onion, finely chopped
2 garlic cloves, minced
Pinch crushed red pepper flakes
1 (14-ounce) can crushed tomatoes
1/2 teaspoon kosher salt, plus more for seasoning
1/2 teaspoon freshly ground black pepper, plus more for seasoning
1/2 cup grated Pecorino Romano
Meatballs:
1 small (6-ounce) onion, grated
1/2 cup chopped fresh flat-leaf parsley, plus 1/4 cup
2/3 cup grated Parmesan cheese, plus 1/4 cup
1/3 cup Italian-style bread crumbs
1 large egg
2 tablespoons ketchup
3 garlic cloves, minced
1/4 teaspoon crushed red pepper flakes
1 teaspoon kosher salt, plus more for seasoning
1/2 teaspoon freshly ground black pepper, plus more for seasoning
8 ounces ground beef
8 ounces ground veal
2 ounces smoked mozzarella cheese, cut into 16 (1/2-inch) cubes
1 pound bucatini or other long pasta
For the sauce: In a large heavy skillet, heat the oil over medium heat. Add the pancetta and cook, stirring constantly, until golden brown, about 5 to 7 minutes. Using a slotted spoon, remove the pancetta and reserve. Add the onion and cook for 5 minutes. Stir in the garlic and red pepper flakes and cook until fragrant, about 30 seconds. Add the tomatoes, 1/2 teaspoon salt, 1/2 teaspoon black pepper, and the cooked pancetta. Simmer, uncovered, over medium-low heat until the sauce thickens, about 15 minutes. Stir in the cheese and season with salt and pepper, to taste.
For the meatballs: Position an oven rack in the lower 1/3 of the oven. Preheat the oven to 400 degrees F. Line a baking sheet with parchment paper.
In a large bowl, combine the onion, 1/2 cup parsley, 2/3 cup Parmesan, bread crumbs, egg, ketchup, garlic, red pepper flakes, 1 teaspoon salt, and 1/2 teaspoon pepper. Add the beef and veal. Using your hands, combine all ingredients gently but thoroughly. Shape the meat mixture into 16 (1 1/2-inch-diameter) meatballs and place on the prepared baking sheet. Make a hole in the center of each meatball and place a cube of mozzarella inside. Reform the meatball so that the mozzarella is completely covered with the meat mixture. Bake the meatballs for 15 minutes until cooked through.
Bring a large pot of salted water to a boil over high heat. Add the pasta and cook until tender but still firm to the bite, stirring occasionally, about 8 to 10 minutes. Drain and place in a large serving bowl. Add the meatballs and sauce. Toss gently and season with salt and pepper, to taste. Sprinkle with the remaining parsley and Parmesan.
Monday, August 27, 2012
Rigatoni with chicken and creamy mushroom sauce
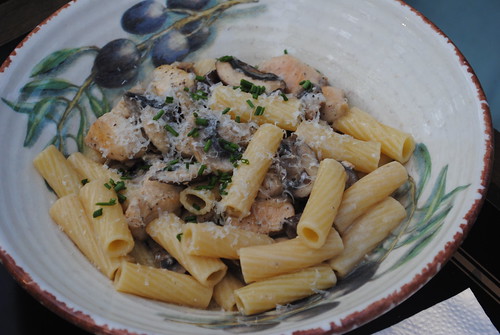
With 16 days (or less) until the arrival of my baby, my motivation comes and goes. Some days the nesting instinct is on a warpath and I'm cleaning everything in sight. Other days my swollen ankles leave me curled on the couch. The same goes for cooking. Last night I was a bit more motivated (I made pan-roasted duck breasts with farro risotto and caramelized figs - watch this space for the recipe). Aside from saying it was a great dinner, my fabulous husband said the nicest thing possible: "I don't know many women who would make this dinner 2 weeks before having a baby." Made my day!!!
Some days, I want to prepare big batches of stuff I can freeze for after baby's arrival. Other days, I'm more likely to take the path of least resistance. This recipe is quick and simple, and as you'll see from the picture, my 2-year-old liked it (though she picked out most of the mushrooms), which meant I only had to make one meal to feed all of us.
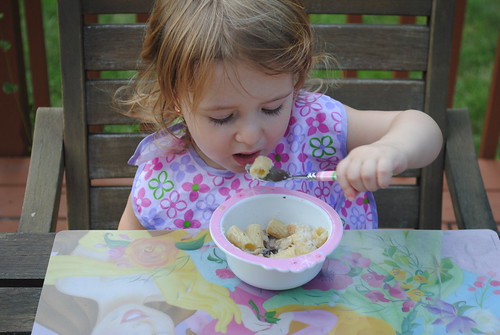
Rigatoni with chicken and creamy mushroom sauce
Adapted from Giada at Home by Giada De Laurentiis
Ingredients
1/2 pound rigatoni pasta
1 tablespoon olive oil
1 shallot, minced
1 clove garlic, minced
Salt and freshly ground black pepper
1 pound assorted mushrooms, (such as cremini, shiitake and button), cleaned and sliced
1/4 cup white wine
1/4 cup chicken stock
1/2 cup (4 ounces) mascarpone cheese, at room temperature
1/4 cup grated Parmesan
1 Tbsp. chopped fresh chives
2 boneless, skinless chicken breasts, cut into 1 inch pieces
Bring a large pot of salted water to a boil over high heat. Add the pasta and cook until tender but still firm to the bite, stirring occasionally, about 8 to 10 minutes.
While the water heats and pasta cooks:
Heat the oil in a large skillet over medium-high heat. Season the chicken with salt and pepper, then add to the pan. Cook chicken until lightly browned on all sides and cooked through. Remove from pan using a slotted spoon and set aside.
Add the shallots and garlic to the pan, adding a little more olive oil if needed. Season with salt and pepper. Cook until soft, about 2 minutes. Add the mushrooms to the pan and season with salt and pepper. Cook until mushrooms are tender, stirring occasionally, about 5 to 7 minutes. Turn the heat to high. Add the wine and cook for 3 minutes until all the liquid evaporates. Add the stock and reserved chicken simmer until liquid is slightly reduced. Remove the pan from the heat. Add the mascarpone cheese. Stir until creamy. Drain the pasta, reserving about 1 cup of the pasta water, and transfer to a serving bowl. Add the mushroom mixture and the Parmesan. Season with salt and pepper, to taste. Toss well to coat pasta, adding the reserved pasta water, if needed, to loosen the pasta. Garnish with the chopped chives. Serve immediately.
Thursday, August 16, 2012
Easy cheese danish

I've entered the final countdown (and yes, the song from the Rocky movie keeps playing in my head). Less than 30 days until my new baby arrives and just 17 days of work. The bathroom and laundry room renovations are done with the exception of the glass shower, but that should be installed early next week. Painters finished this morning so I can reassemble the second floor of my house over the next few days. Then I can focus on the baby...
In the meantime, I've got a freezer stocked with a fair number of quick dinners. I still have to throw together a big batch of Bolognese, but that'll be done soon... While stocking my freezer, I found some things I wanted to use up, including a package of puff pastry. These easy cheese danish were a perfect treat. I assembled them the night before and then just popped the baking sheet in the oven in the morning. My husband claims he prefers them to the ones from our favorite local bakery... impressive! Next time, I might try adding a little fruit as well, maybe some raspberry preserves...
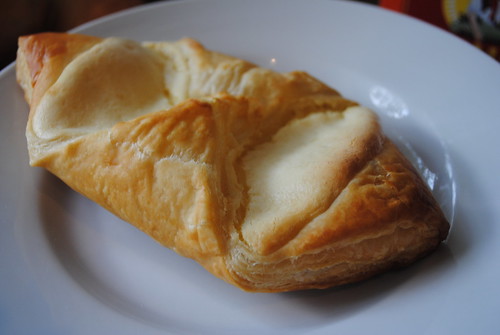
Easy Cheese Danish
adapted from Barefoot Contessa at Home by Ina Garten
4 ounces cream cheese, at room temperature
3 Tbsp.sugar
1 extra-large egg yolk, at room temperature
2 tablespoons ricotta cheese
1 teaspoon pure vanilla extract
1/8 teaspoon kosher salt
1 teaspoon grated lemon zest
1 sheet frozen puff pastry, defrosted
1 egg white beaten with a splash of water, for egg wash
Preheat the oven to 400 degrees F. Line a sheet pan with parchment paper.
Place the cream cheese and sugar in the bowl of an electric mixer fitted with a paddle attachment and cream them together on low speed until smooth. With the mixer still on low, add the egg yolk, ricotta, vanilla, salt, and lemon zest and mix until just combined. Don't whip!
Unfold puff pastry onto a lightly floured board and roll it slightly with a floured rolling pin until it's a 10 by 10-inch square. Cut the sheet into quarters with a sharp knife. Place a heaping tablespoon of cheese filling into the middle of each of the 4 squares. Brush the border of each pastry with egg wash and fold 2 opposite corners to the center, brushing and overlapping the corners of each pastry so they firmly stick together.
Brush the top of the pastries with egg wash. Place the pastries on the prepared sheet pan. Refrigerate the filled Danish for 15 minutes or overnight.
Bake the pastries for about 20 minutes, rotating the pan once during baking, until puffed and brown. Serve warm.
Wednesday, August 8, 2012
Getting local: Frosty summer treats
I don't go outside much these days. 34 weeks pregnant and the temperature and humidity are definitely the enemy. What's worse, I crave ice cream. I haven't gained a ton of weight but 5 more weeks of ice cream might land me in some trouble on that front... Add to that the fact that I have an irresistible 2-year-old who loves "brown" ice cream and I find plenty of excuses to head to a local shoppe. (Why can't I crave stone fruits like my pregnant friend in Ireland???)
My craving has helped me find a few spots worth a visit if you're in NJ. One of them is actually healthy!
I list them below in no particular order...
Zita's Homemade Ice Cream - New Providence - If you live in Jersey, there's a good chance you've heard of or read about Zita's. They have award-winning flavors like S'Mores and have been written up in all the local papers. It's a bit of a drive from our house - 15 minutes or so - so Saturday was our first try. It was GOOD! My little one wanted her favorite: "brown". I gave her the option of plain brown or brown with peanut butter and she quickly replied "Brown with peebah budder". Smart girl. It was delish, decadent chocolate swirled with rich peanut butter. My husband and I shared a cup of their signature flavor: 91716, vanilla ice cream with chocolate covered pretzels, caramel, peanut butter and chocolate chips. It was loaded with stuff, the salt from the pretzels adding an extra layer of flavor. We will be going back (I want to try the S'mores...).
On personal note, this place is run by a guy I went to grade school with. We went our separate ways after grade school, but randomly bumped into each other in DC and then again in Jamaica while in college. He wasn't behind the counter when we ordered, but I spotted him as we left. Next time I'll have to say hi, but things were beyond busy on Saturday with the line wrapping outside the door. But if you see this Pete, nice work! I'll be sending my friends...
Double Dipper Cafe - Fanwood - Note the location and you'll understand why we go to this one more than Zita's. It's less than a mile from our house, just across the street from our favorite sushi place. My duaghter now knows that if she's good while we have our sushi, we will likely head across the street for a scoop after. Here, she likes the peanut butter decadence - vanilla ice cream swirled with lots of peanut butter and studded with tiny peanut butter cups (it's one of my favorites, too.). the best thing I've had from Dipper's is the ice cream cake. I ordered a custom cake for my daughter's borthday - their cakes are 3 layer, standard is chocolate and vanilla, but I swapped the chocolate for Dulce de Leche. Best ice cream cake I've had in ages. It will become her birthday tradition! This is another family-run spot, friendly service and delicious homemade flavors...
And last but not least, the healthy one...
Let's Yo - Watchung - The yogurt craze has taken over and there are places popping up everywhere. This place recently opened in the nearby Blue Star shopping center. They have 18 flavors of self-serve froyo. I've been hitting the place about once a week for the last few weeks - it's organic, most of it is lowfat or nonfat, but most use regular sweeteners (I won't eat artificial sweeteners while pregnant and try to avoid them when I'm not). And they have a topiing bar that takes me back to my childhood summers in Maine where we loved The Viking - and ice cream shoppe with a topping bar. We'd pile on more toppings than ice cream... I'm more conservative these days. My favorite combo at Let's Yo is coconut yogurt with slivered almonds and a drizzle of hot fudge. The chocolate yogurt is remarkably chocolatey. I also tried vanilla - very good - and peanut butter - not up to my standard of excessive peanut-butteriness. They have fruit and candy toppings and everything comes in at $.49 an ounce. A reasonably sized treat costs about $2.50 - not bad at all...
Pregnant or not, this summer heat calls for a cold treat or two, so if you are from Jersey or find yourself in the area this summer, why not indulge? Maybe we'll see each other there!
My craving has helped me find a few spots worth a visit if you're in NJ. One of them is actually healthy!
I list them below in no particular order...
Zita's Homemade Ice Cream - New Providence - If you live in Jersey, there's a good chance you've heard of or read about Zita's. They have award-winning flavors like S'Mores and have been written up in all the local papers. It's a bit of a drive from our house - 15 minutes or so - so Saturday was our first try. It was GOOD! My little one wanted her favorite: "brown". I gave her the option of plain brown or brown with peanut butter and she quickly replied "Brown with peebah budder". Smart girl. It was delish, decadent chocolate swirled with rich peanut butter. My husband and I shared a cup of their signature flavor: 91716, vanilla ice cream with chocolate covered pretzels, caramel, peanut butter and chocolate chips. It was loaded with stuff, the salt from the pretzels adding an extra layer of flavor. We will be going back (I want to try the S'mores...).
On personal note, this place is run by a guy I went to grade school with. We went our separate ways after grade school, but randomly bumped into each other in DC and then again in Jamaica while in college. He wasn't behind the counter when we ordered, but I spotted him as we left. Next time I'll have to say hi, but things were beyond busy on Saturday with the line wrapping outside the door. But if you see this Pete, nice work! I'll be sending my friends...
Double Dipper Cafe - Fanwood - Note the location and you'll understand why we go to this one more than Zita's. It's less than a mile from our house, just across the street from our favorite sushi place. My duaghter now knows that if she's good while we have our sushi, we will likely head across the street for a scoop after. Here, she likes the peanut butter decadence - vanilla ice cream swirled with lots of peanut butter and studded with tiny peanut butter cups (it's one of my favorites, too.). the best thing I've had from Dipper's is the ice cream cake. I ordered a custom cake for my daughter's borthday - their cakes are 3 layer, standard is chocolate and vanilla, but I swapped the chocolate for Dulce de Leche. Best ice cream cake I've had in ages. It will become her birthday tradition! This is another family-run spot, friendly service and delicious homemade flavors...
And last but not least, the healthy one...
Let's Yo - Watchung - The yogurt craze has taken over and there are places popping up everywhere. This place recently opened in the nearby Blue Star shopping center. They have 18 flavors of self-serve froyo. I've been hitting the place about once a week for the last few weeks - it's organic, most of it is lowfat or nonfat, but most use regular sweeteners (I won't eat artificial sweeteners while pregnant and try to avoid them when I'm not). And they have a topiing bar that takes me back to my childhood summers in Maine where we loved The Viking - and ice cream shoppe with a topping bar. We'd pile on more toppings than ice cream... I'm more conservative these days. My favorite combo at Let's Yo is coconut yogurt with slivered almonds and a drizzle of hot fudge. The chocolate yogurt is remarkably chocolatey. I also tried vanilla - very good - and peanut butter - not up to my standard of excessive peanut-butteriness. They have fruit and candy toppings and everything comes in at $.49 an ounce. A reasonably sized treat costs about $2.50 - not bad at all...
Pregnant or not, this summer heat calls for a cold treat or two, so if you are from Jersey or find yourself in the area this summer, why not indulge? Maybe we'll see each other there!
Tuesday, July 31, 2012
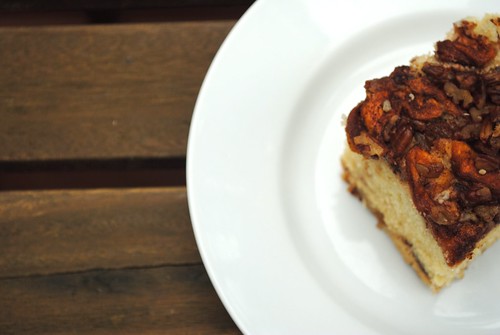
Fresh peach cake
Right now, everything in my home is geared toward getting ready. We're getting ready for the arrival of baby sister - just 6 weeks from tomorrow. So, as you might expect, we're hauling out boxes of clothes from big sister (and chuckling at how tiny everything is), washing clothes, installing car seats, assembling strollers and swings and such... the list goes on. Add to that the fact that we are on week 3 of a major renovation of our master bathroom - which should be done in the next day or two so they can start on the laundry room. Then in 2 weeks the painter arrives. In between, we have house guests every weekend... Getting ready? I'm going to need a 3 month break after all of this!!!
But the change is certainly exciting. My first little girl has made the transition to her big girl bed and she's loving it. She points to her old crib and says "baby sister's" and this weekend she tole me baby sister is her best friend. In my state of pregnancy-hormone overload, I almost cried...
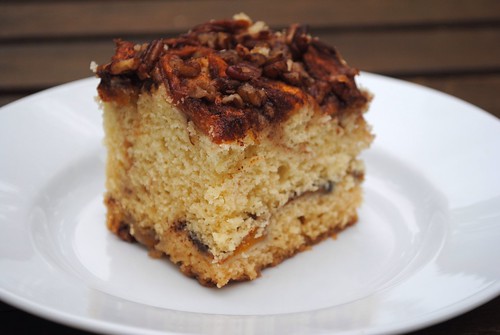
So how to deal with all this chaos? Why not bake a cake? I had a couple of overripe peaches and a couple perfect peaches so this cake was just the thing. Leave a comment with your favorite way to use the season's peaches...
Fresh Peach Cake
adapted from How Easy Is That? by Ina Garten
1/4 pound (1 stick) unsalted butter, at room temperature
1 1/2 cups sugar, divided
2 extra-large eggs, at room temperature
1 cup sour cream, at room temperature
1 1/2 teaspoons pure vanilla extract
2 cups all-purpose flour
1 teaspoon baking soda
1 teaspoon baking powder
1/2 teaspoon kosher salt
2 teaspoons ground cinnamon
3 large, ripe peaches, peeled, pitted, and sliced
1/2 cup chopped pecans
Directions
Preheat the oven to 350 degrees F. Grease a 9-inch square baking pan.
In the bowl of an electric mixer fitted with the paddle attachment, beat the butter and 1 cup of the sugar for 3 to 5 minutes on medium-high speed, until light and fluffy. With the mixer on low, add the eggs, one at a time, then the sour cream and vanilla, and mix until the batter is smooth. In a separate bowl, sift together the flour, baking soda, baking powder, and salt. With the mixer on low, slowly add the dry ingredients to the batter and mix just until combined. In a small bowl, combine the remaining 1/2 cup sugar and the cinnamon.
Spread half of the batter evenly in the pan. Top with half of the peaches, then sprinkle with two-thirds of the sugar mixture. Spread the remaining batter on top, arrange the remaining peaches on top, and sprinkle with the remaining sugar mixture and the pecans.
Bake the cake for 45 to 55 minutes, until a toothpick inserted in the center comes out clean. Serve warm or at room temperature.
Monday, July 23, 2012
Penne Puttanesca
My small person turned 2 on Friday so our weekend was a flurry of Minnie Mouse-Disney Princess-cake-and-ice cream. I am constantly flabbergasted by how quickly she is learning and changing. Amazing little creature - she's got a new word almost every day and she's starting to utter those hilarious phrases that only a toddler can produce. For instance, she recently learned that mommy and daddy have first names so she likes to shout those out from time to time. Her new favorite is to tell us to eat when we have food in front of us - probably because she hears us telling her to do the same. Yesterday, she was playing with one of her babies and put it in her new play high chair. She ran to the kitchen for a dish and spoon and as she was running back, she yelled to baby, "No crying, food coming!" I almost fell down laughing to hear this tiny little person sounding so like an adult...
Needless to say I continue to enjoy motherhood...
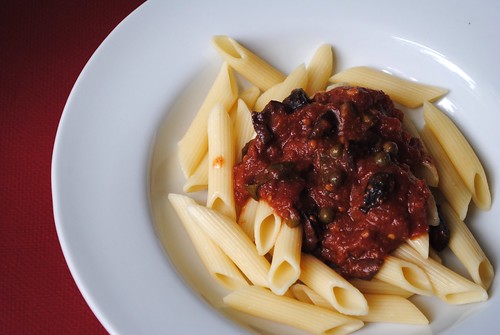
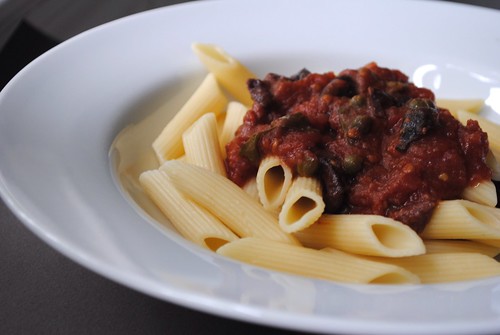
But actually enjoying motherhood means spending less time in the kitchen. I'm fine with that as long as we can still have good, homemade food. This puttanesca takes minutes to make. I threw it together in the morning after I dropped her at daycare and then all I had to do was cook the pasta at dinnertime. I used to hate Puttanesca but now I love it once in awhile - briny olives, a hint of anchovy - it's a nice change from traditional tomato sauce...
Penne Puttanesca
adapted from Eat this Book by Tyler Florence
1/3 cup extra virgin olive oil
4 garlic cloves, minced
6 canned anchovies, rinsed
1 cup Kalamata olives, pitted and roughly chopped
1/2 tsp dried red pepper flakes
3 tbsp capers, drained
2 (28 oz) cans whole tomatoes, preferably San Marzano style, crushed by hand
1/4 cup fresh basil leaves, torn
Kosher salt and freshly ground black pepper
1/3 cup freshly grated Pecorino or Parmigiano-Reggiano cheese
1 pound dried penne
Put a large saucepan over medium heat and add the olive oil. Add the garlic and anchovies and cook, using a wooden spoon to break up the anchovies until they seem to dissolve in the oil. Add the olives, red pepper flakes, and capers, and let that cook for 2 minutes, stirring often.
Toss in the tomatoes with their juices and bring to a low simmer. Stir in the basil and season with salt and pepper. Simmer for 10 minutes. Remove from the heat and stir in the grated cheese. Recipe can be prepared ahead up to this point. Reheat sauce before serving.
Bring a big pot of lightly salted water to a boil for the pasta.
Drop the pasta into the boiling water and cook until al dente. Drain and dump it into a big pasta bowl. At the same time, bring the sauce back to a simmer. Pour it over the drained pasta and toss to coat. Serve immediately.
Thursday, July 12, 2012
Grilled Corn and Sweet Onion Salad
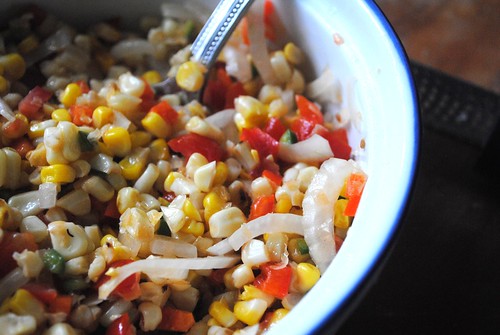
My local farmer's market is one of my favorite summer destinations. I load my little one into her stroller and we walk down bright and early each Saturday. Aside from a few farms, the market offers fresh mozzarella, baked goods, lemonade and my personal favorite: pickles! I have a strong tendency to overbuy produce and pickles... Last week, the tomatoes were too pretty too resist - little yellow cherry tomatoes. I cut some up for Claire and she pointed to it and said "What's that mommy?" When I told her it was a tomato, she gave me a skeptical look then popped it in her mouth... They're now a favorite. As for corn, forget the salad, she wants it on the cob, with "buh-der". She'll happily gnaw on a whole ear (giving mommy and daddy time to eat!)
With my inability to control myself at the market, I frequently end up looking for ways to use up the excess... This corn salad is a nice, light change to corn on the cob. Serve it with grilled beef or chicken for a simple summer dinner.
Grilled corn and sweet onion salad
adapted from Boy Meets Grill by Bobby Flay
2 ears of corn, husks and silk removed and blanched
2 Tbsp. olive oil, plus extra for brushing the corn
1 Tbsp. cup aged sherry vinegar
1 tsp.Dijon mustard
1 small garlic clove, minced
1 small red bell pepper, diced
1/2 large Vidalia onion, thinly sliced
1 ripe plum tomato, finely chopped
1 jalapeno pepper, finely chopped, seeded if desired
1 Tbsp. finely chopped chives
Salt and pepper
Preheat grill. Brush the blanched corn with oil and season with salt and pepper to taste. Grill until slightly charred on all sides, about 2 minutes. Remove from the grill and with a sharp knife, scrape the kernels into a medium bowl.
Combine the vinegar, mustard, and garlic in a large bowl and slowly whisk in the remaining olive oil until emulsified. Add the corn kernels, bell peppers, onion, tomatoes, jalapeno, and chives, and toss to coat with the dressing. Season with salt and pepper.
Monday, July 9, 2012
Scrumptious, Moist Coconut Cake that's EASY!
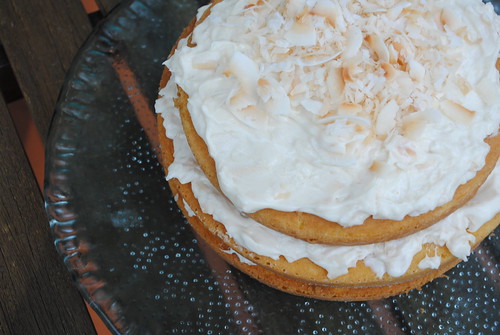
When the temperature outside rivals that of my oven, it's usually my cue not to turn the oven on. After all, I'm nearly 7 months pregnant which means I'm a walking oven to begin with. And my poor central air is cranking away just trying to keep us comfortable. So why add more heat to the mix by turning on the oven? This cake is as good a reason as any. It's moist, really moist. And easy (you start with a cake mix...) So on went the over (and I can hole up in the cold basement while it bakes...)
The recipe calls for 3 9-inch pans. As you will see from my photos, I have 2 9-inch, so I used an 8-inch for the top layer. Perhaps not the most beautiful results, but it sure was tasty...

Moist, easy coconut cake
From Family Meal, by Tyler Florence
Cake:
1 package yellow cake mix
1 3.4 ounce package instant vanilla pudding
4 large eggs
1/4 cup coconut or vegetable oil
2 cups sweetened shredded coconut
Frosting:
2 cups sweetened shredded coconut
2 tablespoons unsalted butter, at room temperature
8 ounces cream cheese, at room temperature
2 teaspoons whole milk
3 1/5 cups confectioners sugar, sifted
1/2 teaspoon pure vanilla extract
Directions
Preheat the oven to 350 degrees F. Grease two 9 inch round cake pans and dust with flour, tapping out the excess.
In a large bowl, combine the cake mix, pudding mix, eggs, oil, and 1 1/2 cups water. With an electric mixer, beat on medium speed until well combined. Sir in the coconut.
Pour the batter into the prepared cake pans and bake for 35-40 minutes or until a toothpick inserted in the center comes out clean.
Make the frosting: Spread the coconut on a rimmed baking sheet. Toast in the oven for 10 minutes, or until lightly browned, stirring once or twice to ensure it browns evenly. Let cool. Combine the butter and cream cheese in a mixing bowl. Use an electric mixer on medium-high speed to beat until fluffy. Add the milk and beat until smooth. Beat in the confectioners’ sugar, then beat in the vanilla. Stir in all but 1/2 cup of the toasted coconut.
Place one cake layer on a cake stand and spread with some of the frosting. Add the next layer, then more frosting. Top with the last 1/2 cup of shredded coconut. Refrigerate until ready to serve.
Monday, June 25, 2012
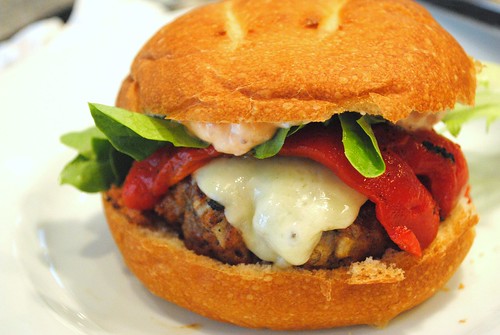
Beef and Andouille Burgers with Asiago Cheese
With another little one on the way, I've been trying out lots of new ideas and recipes for quick meals: sandwiches, pastas, burgers, etc. By the time my tiny one arrives in September, I'm hoping to have a nice repertoire of quick meals so we can keep eating delicious food while taking care of our new little girl and her big sister... (Leave a comment with ideas for meals!!!)
When I had the first one, I was more than a little delusional about how much time I would have to cook. I thought I'd be making three-course meals while she slept the day away. She did sleep a lot, but in fits and spurts (and her preferred location was on top of mommy!), allowing little time for extravagant meals. More than once we resorted to take-out... This time I know what I'm in for!
These burgers had me at the title. Beef, andouille, cheese... And they're topped with a delicious sauce made from sun-dried tomatoes, mustard and mayo. Add some fire roasted peppers and this is a burger I'll eat again (and again).
Beef and Andouille Burgers with Asiago Cheese
adapted from the Bon Appetit Cookbook
4 oil-packed sun-dried tomatoes, drained
1/3 cup mayonnaise
1 tablespoon whole-grain Dijon mustard
6 ounces andouille sausages,* cut into 1-inch pieces
1 1/2 pounds ground beef (15% fat)
1 large shallots, minced
1 teaspoons salt
1 teaspoons ground black pepper
1/2 teaspoon fennel seeds, crushed
4 large sesame-seed hamburger buns
Sliced Asiago cheese
1 7- to 7 1/2-ounce jar roasted red peppers, drained
Lettuce and sliced onion, if desired
Finely chop sun-dried tomatoes in processor. Blend in mayonnaise and mustard. Transfer to small bowl. (Can be made 1 day ahead. Cover; chill.)
Finely chop andouille sausages in processor. Transfer to large bowl. Add beef, shallots, salt, pepper, and crushed fennel seeds. Stir with fork just until blended. Form mixture into 4 1-inch-thick patties.
Prepare barbecue (medium-high heat). Grill hamburger buns until golden, about 2 minutes. Transfer to platter. Grill hamburgers to desired doneness, about 5 minutes per side for medium-rare. Place cheese over top of burgers and allow to melt.
Spread cut sides of hamburger buns with sun-dried-tomato mayonnaise. Top bottom halves of buns with hamburgers, then red peppers. Top with lettuce and onion slices. Cover with top halves of buns and serve.
Monday, June 4, 2012
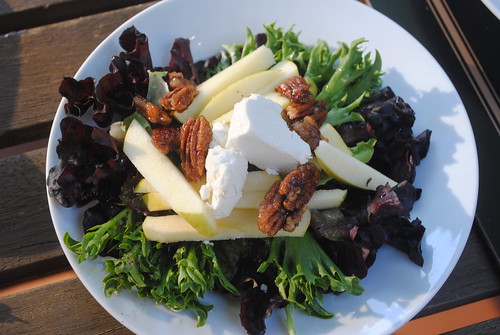
Composed Salad of Mixed Greens, Goat Cheese and Caramelized Pecans
Even though Mother's Day is already almost a month behind us, I'm still trying to find time to dig into the gift my husband got me (best husband ever!). He got me 4 books - not cookbooks, but books known for their exquisite passages on food. Two are foodie books: Heat by Bill Buford and On Food and Cooking by Harold McGee; and the other two are more literary: The Belly of Paris by Emile Zola and When You Lunch with the Emperor by Ludwig Bemelmans.
Before I dive into them, I promised myself I'd finish the book I'm currently reading: Mockingjay - the final book in the Hunger Games trilogy. The book's an easy read but it's slow going because I cannot find the time to read. I'll get there though.
Anybody read these books? thoughts on them? I can't wait to dive in. I think I'll start with Heat and go from there. But my summer reading list is all set.
In the meantime, I've started my weekly visits to the Scotch Plains Farmers' Market. Each Saturday, I head out with my little one in her stroller. At 5 1/2 months pregnant, I'm hoping I can make it through most of the summer walking... we shall see. But my findings at the market inspire delicious summer salads like this one...
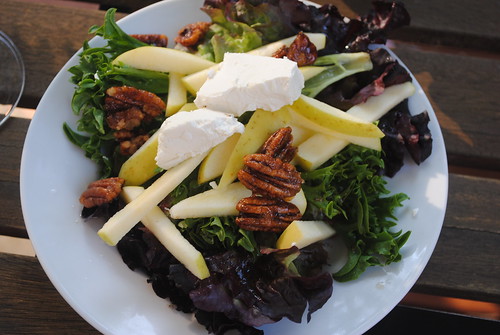
Composed Salad of Greens, Goat Cheese, and Caramelized Pecans
From Essential Pepin by Jacques Pepin
Serves 4
CARAMELIZED PECANS
1/4 cup pecan halves
1/2 teaspoon canola oil
1 tablespoon sugar
Pinch of salt
Pinch of cayenne
1 medium apple, preferably russet or Golden Delicious
1 1/2 teaspoons fresh lemon juice
DRESSING
1 1/2 tablespoons oil, preferably a mixture of walnut, hazelnut, and/or canola
1 1/2 teaspoons sherry vinegar
1/8 teaspoon salt
1/4 teaspoon freshly ground black pepper
4 cups salad greens, preferably mesclun
1 ounce semi-dry or hard goat cheese, crumbled into pieces about 1/2 inch in size
For the pecans:
Put the pecans in a skillet and cover (barely) with water.
Bring to a simmer over high heat, and immediately drain. Return the pecans to the pan and add the oil, sugar, salt, and cayenne. Cook over medium-high heat, stirring, until the nuts brown and the sugar mixture caramelizes. Transfer the pecans to a plate to cool.
Halve the apple and remove the core. Cut it into 1/2-inch-thick slices. Stack the slices and cut them into 1/2-inch wide strips. Mix the apple strips with the lemon juice and set aside.
For the dressing:
Mix all the ingredients together in a large bowl.
At serving time, toss the greens with the vinaigrette, and arrange on individual plates. Sprinkle with the apple strips, crumbled cheese, and pecans. Serve immediately.
Tuesday, May 29, 2012
Welcome summer: Lobster rolls

Find an updated version of this recipe on my new blog, white plate blank slate lobster rolls.
I love lobster. As a kid I loved tearing into a whole steamed lobster, starting with the claws and ending by sucking the meat out of each little leg. My dad probably did most of the work... It reminds me of summer vacations on Martha's Vineyard and in Maine, where those yummy red creatures always held a starring role.
Lately, lobster prices in New Jersey hit rock bottom in May and June. A couple years ago, they went as low as $3.99 per pound (I pay $7 a pound for smoked turkey!). A week and a half ago, they went down to $5.99. We've had them 3 times since... First time, we grilled them. Second time, I made lobster mac 'n' cheese. And yesterday, to celebrate Memorial Day in style, I made lobster rolls for lunch. I like to keep them simple - a few ingredients so the lobster really stands out. And as you can see from the picture, I like big chunks of meat, no wimpy little bits for us.
I steam the lobsters the night before, let them cool and then shell them in the morning. Toss them with the dressing a little while before serving. Serve with some good chips and a dill pickle for a terrific summer lunch or dinner.
And a tip for getting every juicy bit of meat: use a rolling pin to squeeze the meat out of the legs... it's tender and sweet!
(Prices are back up today... but I'll find another way to prepare them if the price goes down again, so leave a comment with your favorite way to enjoy lobster to give me some ideas!)
Lobster rolls
Meat from 2 1.5-lb steamed lobsters
1/3 cup mayonnaise
1 Tbsp. capers
1 celery stalk, diced
6 long rolls, preferably New England style or top cut hot dog buns
Butter
Lettuce, optional
Stir together the mayonnaise, capers and celery. Add about 2/3 of it to the lobster meat and stir to combine. If needed add some more, but don't overdress the lobster.
Heat a large frying pan over medium heat. Spread each side of the buns with a little butter then brown the buns in the heated pan, turning so both sides are crisp and golden.
Line each bun with a bit of lettuce, the scoop the lobster into them. Serve immediately.
Makes 6. Enough for 3 adults for lunch or dinner.
Wednesday, May 16, 2012
Ricotta and spinach ravioli with butter and sage

I don't often tout other companies and services here, but as a cookbook lover, I have become obsessed with Eat Your Books. It's a web-based service that catalogs thousands of cookbooks by recipe and ingredient. I have 140 cookbooks, more than most people, but a lot less than some collectors. Digging thru them for ideas is a time-consuming task to say the least.
Until I found EYB. I quickly added all of my books to my bookshelf and was happy to find most of them are indexed. The site quickly reported that I have more than 20,000 recipes. But here's the good part: if I have an ingredient I want to use, I no longer have to pull out a pile of books and search the index of each. I simply type in the ingredient and within seconds, I have a list of recipes that use it. That's how I found this recipe for Eric Ripert's Spinach and Ricotta ravioli with butter and sage. I had a big bag of baby spinach in my fridge so I did a search on spinach. After narrowing my search to exclude salads and such, I hit the perfect accompaniment to a grilled veal chop.
Of course, I cheated. I didn't have time to make the fresh pasta so I used wonton wrappers - my go-to trick for quick, light homemade ravioli. They're thinner than most pasta so they let the filling really shine...
I'd recommend EYB for anyone with a lot of cookbooks and a hatred for wasted food. (Watch this space ina few days to see what I did with leftover buttermilk.) There are days when nothing but a pile of my friends (Mario, Giada, Laurent, Eric...) will do - when I flip lovingly thru the pages getting ideas. But most days I don't have the time to spend sifting thru cookbooks, so it's EYB to the rescue!
Leave a comment and let me know what tricks you've found for sorting thru recipes and cookbooks...

Ricotta and Spinach Ravioli with Butter and Sage
adapted from Avec Eric by Eric Ripert
1 Tbsp. olive oil
1 garlic clove, minced
4 oz. baby spinach, washed
sea salt and freshly ground black pepper
1/2 cup ricotta cheese
1/4 cup freshly grated Parmesan
1 egg yolk
16 wonton wrappers
2 Tbsp. unsalted butter
2 Tbsp. torn fresh sage leaves
Heat oil in a pan over medium heat. Add the garlic and saute briefly until soft and aromatic. Add the spinach and season to taste with salt and pepper. Cook until just wilted then remove from heat. When cool enough to handle, squeeze out excess moisture.
Chop the spinach then combine with the ricotta and Parmesan. Season to taste with salt and pepper then stir in the egg yolk.
Working on a lightly floured surface, place one scoop (about a tablespoon) of filling on each wonton wrapper. Moisten the edges of the wrapper with water or the leftover egg white. Fold over, then press firmly to seal, making sure there are no air bubbles. Repeat with remaining filling and wrappers.
Bring a large pot of salted water to a boil over high heat. Add the ravioli and cook until they float (about 1 to 2 minutes). Gently drain and place in a large bowl. Toss them with the butter and then mix in the sage leaves. Garnish with freshly grated Parmesan and service immediately.
Serves 2 (can easily be doubled).
Thursday, May 10, 2012
Goat cheese and tomato tarts
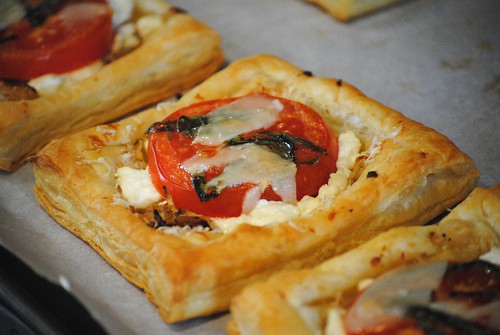
Last weekend, we rented the latest Mission Impossible flick. Not really a movie that'll go down as one of the greats but I don't mind Tom Cruise and I was reminded of the old MI series I liked as a kid... But it brought to mind the fact that I'm on a mission. And this time I'm serious about it. I have a lot of cookbooks; maybe not as many as some collectors, but I have more than 140. And sadly I've only made a couple recipes from most. Some I've never even used. So my mission, should I choose to accept it, is to make at least 5 recipes from each.
Maybe I'll get there, maybe not. But I've enjoyed dusting off a number of them and perusing them again. I have a bunch of the Barefoot Contessa books and I've made only a few recipes from the lot. I scanned "Back to Basics" and there are some great simple ideas in the book. Take these tarts: store-bought puff pastry transformed to a delicious tart filled with goat cheese, sauteed onions, fresh tomatoes and fresh herbs. I made a modified version for my little girl without the onions and goat cheese and she gobbled some of it and then enjoyed ripping apart the puff pastry!
I paired these with a simple marinated flank steak and some sauteed mushrooms. I'll be making them again soon with some veal chops I've got hidden away... They'd also make a great appetizer in a smaller version or an accompaniment to a salad.
We'll see how my mission progresses. At last count, I've only actually made 5 or more recipes from about 25% of my collection. I've got some work to do, but impossible? I think not.
Goat Cheese and Tomato Tarts
adapted from Back to Basics by Ina Garten
1 package (17.3 ounces/2 sheets) puff pastry, defrosted
Good olive oil
4 cups thinly sliced yellow onions (2 large onions)
3 large garlic cloves, cut into thin slivers
Kosher salt and freshly ground black pepper
3 tablespoons dry white wine
2 teaspoons minced fresh thyme leaves
4 tablespoons freshly grated Parmesan, plus 2 ounces shaved with a vegetable peeler
8 ounces plain goat cheese
2 large tomatoes, each cut into 4 (1/4-inch-thick) slices
3 tablespoons julienned basil leaves
Unfold a sheet of puff pastry on a lightly floured surface. Cut into 4 equal pieces. Repeat with second pastry sheet. Place them on sheet pans lined with parchment and refrigerate until ready to use.
Preheat the oven to 425F.
Heat 3 tablespoons of olive oil in a large skillet over medium to low heat and add the onions and garlic. Saute for 15 to 20 minutes, stirring frequently, until the onions are limp and there is almost no moisture remaining in the skillet. Add 1/2 teaspoon salt, 1/4 teaspoon pepper, the wine, and thyme and continue to cook for another 10 minutes, until the onions are lightly browned. Remove from the heat.
Using a sharp paring knife, score a 1/4-inch-wide border around each pastry square. Prick the pastry inside the score lines with the tines of a fork and sprinkle a tablespoon of grated Parmesan on each square, staying inside the scored border.
Place 1/8 of the onion mixture on each circle, again staying within the scored edge. Crumble 1 ounce of goat cheese on top of the onions. Place a slice of tomato in the center of each tart. Brush the tomato lightly with olive oil and sprinkle with basil, salt, and pepper. Finally, scatter 4 or 5 shards of Parmesan on each tart.
Bake for 20 to 25 minutes, until the pastry is golden brown. The bottom sheet pan may need an extra few minutes in the oven. Serve hot or warm.
Wednesday, April 25, 2012
Chicken Thighs and Olive-Fennel Salad with Grilled Lemon Slices

A little over five weeks ago, I left the job I'd been at for nearly twelve years. I'm still with the same company but I've changed divisions and I now work full-time from home. I've gotta say there are pluses and minuses to working from home. I can work in my slippers. I can make my lunch fresh (and eat it on the deck if my schedule allows). But I am also always within a few feet of my office. I check email at 7 a.m., 7 p.m. and everything in between. But all in all, it suits me.
I do make sure I keep work in the office as much as possible so there is some line between work and play. And I no longer mind those evening calls because I still get to see my little one in between. I don't know who invented working from home, but I think it had to have been a working mom...
As for the job itself, I'm loving it. Some days I'm not sure my teammates are speaking English. I'm in a much more technical group now with people who have decades of expertise in IT. (My boss is a "Distinguished Technologist". Impressive: yes. A bit scary: yes.) They toss out acronyms faster than you can say boo (this morning I googled COBIT), but I'm learning... It's nice to be learning again...
One thing working from home allows me to do is throw meat into a marinade in the morning. (It's the little things that make me happy.) This simple, light recipe is quick, easy and tasty. (Don't be scared off by the fennel, the lemon juice mellows the licorice flavor...)
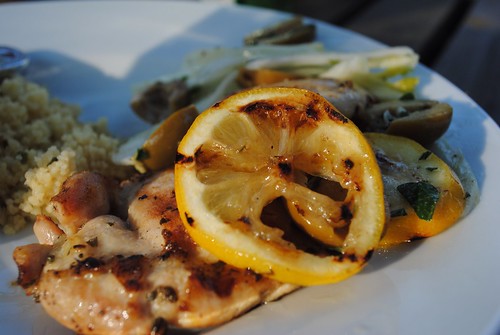
Chicken Thighs and Olive-Fennel Salad with Grilled Lemon Slices
adapted from Weber's Time to Grill
Prep time: 20 minutes
Marinating time: 1 hour or more
Grilling time: 8 to 10 minutes
1 lemon, cut crosswise into ¼-inch slices
1 teaspoon granulated sugar
Kosher salt
Salad
1 small fennel bulb
3/4 cup pitted green olives, cut in half
Zest of 1 lemon, in long, thin shreds
1 tablespoon fresh lemon juice
1 teaspoon minced fresh oregano leaves
1 clove garlic, minced
Extra-virgin olive oil
Ground black pepper
Chicken and marinade:
6 boneless, skinless chicken thighs, each about 4 ounces
3 Tbsp. olive oil
1 Tbsp. chopped fresh oregano
1 tsp. lemon zest
1 Tbsp. lemon juice
2 cloves garlic minced
Salt and pepper to taste
In a medium bowl combine the lemon slices with the sugar and 1 tablespoon salt. Mix well and let the slices marinate at room temperature for 1 hour or cover and refrigerate overnight.
Combine marinade ingredients in a large bag and add the chicken, tossing to coat. Refrigerate for at least 1 hour or overnight.
Prepare the grill for direct cooking over medium heat (350° to 450°F).
Cut off the thick stalks and the root end from the fennel bulb and discard them. Cut the bulb lengthwise into quarters and then cut away and remove the thick triangular-shaped core. Cut the fennel vertically into ?-inch slices. Put the fennel in a medium bowl and add the remaining salad ingredients, including 1 tablespoon oil and ¼ teaspoon pepper. Set aside.
Drain (don’t rinse) the lemon slices and brush them on both sides with oil.
Brush the cooking grates clean. Grill the chicken thighs, smooth (skin) side down first, and the lemon slices over direct medium heat, with the lid closed as much as possible, until the meat is firm and the juices run clear and the lemon slices are nicely browned, 8 to 10 minutes, turning once or twice. Remove from the grill and let the chicken thighs rest for 3 to 5 minutes. Serve warm with the olive salad and lemon slices.
Thursday, April 19, 2012
Slow and smoky barbecued brisket
The past week has been chock full of wildlife - and for once I don't mean my little monkey of a 21-month old. One morning last week, Jeff got her out of bed and brought he into the kitchen and immediately went running out the backdoor. A deer had made an appearance. She was pointing and saying "deer" in her cute little voice as daddy carried her across the grass in her jammies. The deer quickly took flight.
Then on Saturday, we took her to the zoo. There's a great zoo in suburban NJ called the Turtle Back Zoo. Perfect for a day-trip, we arrived at 10 a.m. and made our rounds in about 2 hours. She loves pointing at the animals, especially the horses and monkeys ("ah-ahs").
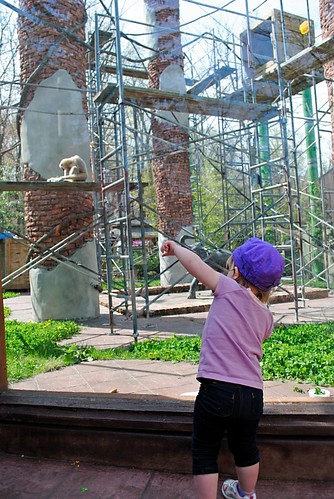
One would think that was enough for animal sightings, but on Monday night, we sat on the deck eating dinner and something caught my eye out by her slide. It was a raccoon that was about twice her size. Brave daddy quickly left the deck to scare it off.
And last but not least, this morning I looked out the window and saw a big, orange fox. Now, I don't live in a woodsy area. My neighborhood is pretty developed so wildlife is usually limited to squirrels, birds and such. So now I'm wondering what will show up next... a wolf? (I tried to snap a pic of the fox and went running barefoot across the grass, but it took off when it saw me coming. I'll be better prepared next time - I've got the zoom lens on my camera now)
Anyway, enough about wildlife in suburban NJ. I took advantage of the recent Jewish holiday to get a great deal on a beef brisket. I've never made brisket, but have long wanted to make barbecue (other then ribs). I turned to my old friend Laurent Tourondel for some guidance.
This could be served plated, but we decided to go with sandwiches. I topped them with homemade cole slaw and some aged cheddar from Oscar's Smokehouse... Delish!
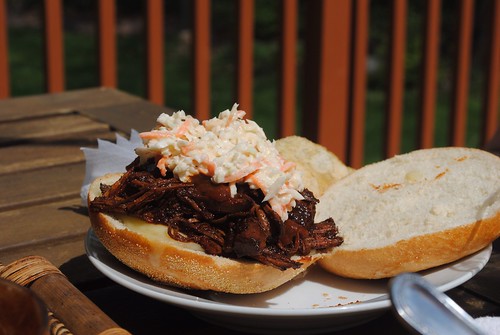
Barbecued Beef Brisket with BLT BBQ sauce
Adapted from The BLT Cookbook by Laurent Tourondel
Dry Rub:
3 tablespoons chili powder
1 1/2 tablespoons paprika
1 tablespoons dried oregano
1 tablespoons garlic powder
1/4 teaspoon cayenne
3/4 teaspoons black pepper
3/4 teaspoons sugar
3/4 teaspoons dry mustard
1/4 teaspoons ground cloves
3/4 teaspoons celery seed
3/4 teaspoons salt
2-1/2 pounds beef brisket, trimmed
3 Tbsp hickory chips for an indoor smoker (or use an outdoor smoker if you have one)
3 cups BLT Barbecue Sauce, (recipe follows)
To serve: Homemade cole slaw, buns and sharp cheddar cheese
Make the Dry Rub
In a bowl, mix together all of the dry ingredients. Place the meat in a roasting pan and rub on all sides with the mixture. Cover and chill at least 4 hours.
Smoke the Brisket
In the bottom of a stove-top smoker, arrange the hickory chips, mounding them slightly in the center. Place the pan and rack on top, and place brisket on top of the rack. Cover tightly with the lid and place over low heat for 1 hour. For an outdoor smoker, follow manufacturer’s directions.
Preheat the Oven to 325° F.
Roast the Brisket
Place the brisket in a large roasting pan. Pour the Barbecue Sauce on top of the meat. Pour 1-1/2 cups of water into the pan around the meat. Cover with aluminum foil, making a tent so that it does not touch the meat. Cook for 4 hours, basting occasionally, until the brisket is tender when pierced with a fork at the thickest part.
BBQ SAUCE
Makes about 5-1/2 cups
15 garlic cloves, peeled (about 1 whole head)
1 tablespoon olive oil
Salt
3 cups ketchup
3 ribs celery, chopped
1-1/2 medium size sweet onions, such as Vidalia or Bermuda, chopped
1-1/2 cups water
3/4 cup dark brown sugar
3/4 cup (1-1/2 sticks) unsalted butter
3/4 cup Worcestershire sauce
3/4 cup apple cider vinegar
3 tablespoons chili powder
1 tablespoon instant espresso powder
3/4 teaspoon cayenne pepper
3/4 teaspoon crushed red pepper flakes
3/4 teaspoon salt
3/4 teaspoon ground cloves
Preheat the Oven to 375°F.
Roast the Garlic
In a small baking pan, toss the garlic cloves with the oil and a pinch of salt. Roast for 30 minutes or until very soft and beginning to brown.
Cook the Sauce
Combine all of the ingredients in a large heavy saucepan. Bring to a simmer over medium heat. Cook the sauce, stirring it frequently to prevent it from scorching, for 45 minutes or until the vegetables are soft and the sauce looks dark and rich.
Blend the sauce
Let cool slightly. Pour the sauce into a blender or food processor. Blend until completely smooth. Taste for seasoning.
Sauce will keep for about a month in the refrigerator.
Then on Saturday, we took her to the zoo. There's a great zoo in suburban NJ called the Turtle Back Zoo. Perfect for a day-trip, we arrived at 10 a.m. and made our rounds in about 2 hours. She loves pointing at the animals, especially the horses and monkeys ("ah-ahs").
One would think that was enough for animal sightings, but on Monday night, we sat on the deck eating dinner and something caught my eye out by her slide. It was a raccoon that was about twice her size. Brave daddy quickly left the deck to scare it off.
And last but not least, this morning I looked out the window and saw a big, orange fox. Now, I don't live in a woodsy area. My neighborhood is pretty developed so wildlife is usually limited to squirrels, birds and such. So now I'm wondering what will show up next... a wolf? (I tried to snap a pic of the fox and went running barefoot across the grass, but it took off when it saw me coming. I'll be better prepared next time - I've got the zoom lens on my camera now)
Anyway, enough about wildlife in suburban NJ. I took advantage of the recent Jewish holiday to get a great deal on a beef brisket. I've never made brisket, but have long wanted to make barbecue (other then ribs). I turned to my old friend Laurent Tourondel for some guidance.
This could be served plated, but we decided to go with sandwiches. I topped them with homemade cole slaw and some aged cheddar from Oscar's Smokehouse... Delish!
Barbecued Beef Brisket with BLT BBQ sauce
Adapted from The BLT Cookbook by Laurent Tourondel
Dry Rub:
3 tablespoons chili powder
1 1/2 tablespoons paprika
1 tablespoons dried oregano
1 tablespoons garlic powder
1/4 teaspoon cayenne
3/4 teaspoons black pepper
3/4 teaspoons sugar
3/4 teaspoons dry mustard
1/4 teaspoons ground cloves
3/4 teaspoons celery seed
3/4 teaspoons salt
2-1/2 pounds beef brisket, trimmed
3 Tbsp hickory chips for an indoor smoker (or use an outdoor smoker if you have one)
3 cups BLT Barbecue Sauce, (recipe follows)
To serve: Homemade cole slaw, buns and sharp cheddar cheese
Make the Dry Rub
In a bowl, mix together all of the dry ingredients. Place the meat in a roasting pan and rub on all sides with the mixture. Cover and chill at least 4 hours.
Smoke the Brisket
In the bottom of a stove-top smoker, arrange the hickory chips, mounding them slightly in the center. Place the pan and rack on top, and place brisket on top of the rack. Cover tightly with the lid and place over low heat for 1 hour. For an outdoor smoker, follow manufacturer’s directions.
Preheat the Oven to 325° F.
Roast the Brisket
Place the brisket in a large roasting pan. Pour the Barbecue Sauce on top of the meat. Pour 1-1/2 cups of water into the pan around the meat. Cover with aluminum foil, making a tent so that it does not touch the meat. Cook for 4 hours, basting occasionally, until the brisket is tender when pierced with a fork at the thickest part.
BBQ SAUCE
Makes about 5-1/2 cups
15 garlic cloves, peeled (about 1 whole head)
1 tablespoon olive oil
Salt
3 cups ketchup
3 ribs celery, chopped
1-1/2 medium size sweet onions, such as Vidalia or Bermuda, chopped
1-1/2 cups water
3/4 cup dark brown sugar
3/4 cup (1-1/2 sticks) unsalted butter
3/4 cup Worcestershire sauce
3/4 cup apple cider vinegar
3 tablespoons chili powder
1 tablespoon instant espresso powder
3/4 teaspoon cayenne pepper
3/4 teaspoon crushed red pepper flakes
3/4 teaspoon salt
3/4 teaspoon ground cloves
Preheat the Oven to 375°F.
Roast the Garlic
In a small baking pan, toss the garlic cloves with the oil and a pinch of salt. Roast for 30 minutes or until very soft and beginning to brown.
Cook the Sauce
Combine all of the ingredients in a large heavy saucepan. Bring to a simmer over medium heat. Cook the sauce, stirring it frequently to prevent it from scorching, for 45 minutes or until the vegetables are soft and the sauce looks dark and rich.
Blend the sauce
Let cool slightly. Pour the sauce into a blender or food processor. Blend until completely smooth. Taste for seasoning.
Sauce will keep for about a month in the refrigerator.
Tuesday, April 10, 2012
Butternut squash risotto
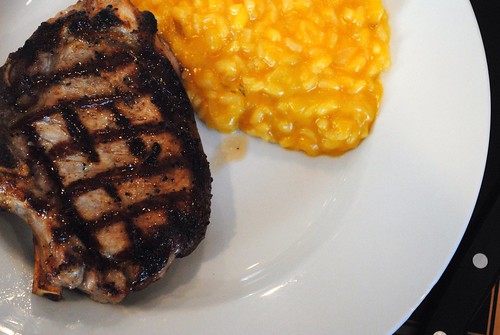
My mission to get my 21-month old eating new foods continues. (She's winning.) As a foodie, I refuse to give in, so I simply blame teething. She did just get her bottom canines and the top ones remain a work in progress, so meals have been a challenge of late. One dinner last week consisted of a piece of bread with butter (she calls it cheese - whatever works), a few peas and some peaches. Rice, pasta and cheese remain on the good list, but meat in all its forms is suddenly (and adamantly) on the no list. But I like a challenge.
I was planning our dinner for Saturday and I'd settled on veal chops for me and Jeff and a beet and goat cheese salad with candied walnuts and arugula. But I needed a starch. A nice butternut squash caught my eye and I decided to try to make butternut squash risotto. And maybe, just maybe, wee one would partake. I mean it's rice, it's orange, and I was going to add parmesan cheese.
I was further encouraged when she eyed it in the pan and yelled "cheeeeeese!". Excellent. My plan was working. I scooped a small amount into her princess dish and blew on it til it cooled. She was ready, spoon in hand as soon as I put it down. She took a scoop put it in her mouth and... spit it out. Then she picked up the cherished princess dish, held it out to me and said "No." Another battle lost.
Don't let her opinion sway you though. This risotto is silky smooth, a bit sweet and pairs nicely with a grilled steak or chop. I tend to get risotto fatigue and just make mushroom risotto, so I'm happy to have found another variety we like. And I'll get little one to try it again... I may have lost the battle but...
Butternut squash risotto
2 cups butternut squash, peeled and cut into 3/4 inch cubes
5 cups chicken stock
2 Tbsp. olive oil
1 medium onion, chopped
2 cloves garlic, chopped
1 cup Arborio rice
1/4 cup dry white wine
1 sprig thyme
small bunch of fresh sage leaves, chopped (about 10-15 leaves)
3/4 cup freshly grated Parmigiano-Reggiano
Salt and pepper to taste
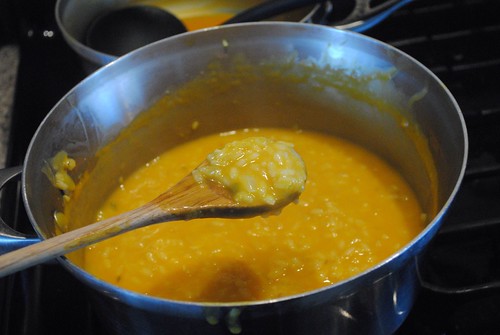
In a medium saucepan, bring the squash and stock to a boil, then reduce heat and simmer until squash is tender, about 12 minutes. Remove from heat and cool slightly. Using a hand blender, puree the mixture. Alternatively, transfer to a blender or food processor. Return to pan and keep warm over low heat.
In another saucepan, heat the oil. Add the onion and cook until tender. Don't let the onion brown. Add the garlic and cook 1 minute more. Add the rice and stir together, allowing the rice to cook for a minute. Add the wine and stir until the wine has been absorbed. Add the sage and thyme.
Begin adding the reserved squash/stock puree about one cup at a time. Allow most of the liquid to be absorbed before adding more. Continue adding liquid until rice is almost cooked through. It should be al dente. Stir in the cheese and season to taste with salt and pepper. Serve immediately.
Subscribe to:
Posts (Atom)


 Posts
Posts






