About Recipes Restaurants FAQ My Kitchen My Kitchen
Showing posts with label breakfast. Show all posts

Thursday, August 16, 2012

Easy cheese danish

DSC_0008

I've entered the final countdown (and yes, the song from the Rocky movie keeps playing in my head). Less than 30 days until my new baby arrives and just 17 days of work. The bathroom and laundry room renovations are done with the exception of the glass shower, but that should be installed early next week. Painters finished this morning so I can reassemble the second floor of my house over the next few days. Then I can focus on the baby...

In the meantime, I've got a freezer stocked with a fair number of quick dinners. I still have to throw together a big batch of Bolognese, but that'll be done soon... While stocking my freezer, I found some things I wanted to use up, including a package of puff pastry. These easy cheese danish were a perfect treat. I assembled them the night before and then just popped the baking sheet in the oven in the morning. My husband claims he prefers them to the ones from our favorite local bakery... impressive! Next time, I might try adding a little fruit as well, maybe some raspberry preserves...

DSC_0010

Easy Cheese Danish
adapted from Barefoot Contessa at Home by Ina Garten

4 ounces cream cheese, at room temperature
3 Tbsp.sugar
1 extra-large egg yolk, at room temperature
2 tablespoons ricotta cheese
1 teaspoon pure vanilla extract
1/8 teaspoon kosher salt
1 teaspoon grated lemon zest
1 sheet frozen puff pastry, defrosted
1 egg white beaten with a splash of water, for egg wash

Preheat the oven to 400 degrees F. Line a sheet pan with parchment paper.

Place the cream cheese and sugar in the bowl of an electric mixer fitted with a paddle attachment and cream them together on low speed until smooth. With the mixer still on low, add the egg yolk, ricotta, vanilla, salt, and lemon zest and mix until just combined. Don't whip!

Unfold puff pastry onto a lightly floured board and roll it slightly with a floured rolling pin until it's a 10 by 10-inch square. Cut the sheet into quarters with a sharp knife. Place a heaping tablespoon of cheese filling into the middle of each of the 4 squares. Brush the border of each pastry with egg wash and fold 2 opposite corners to the center, brushing and overlapping the corners of each pastry so they firmly stick together.

Brush the top of the pastries with egg wash. Place the pastries on the prepared sheet pan. Refrigerate the filled Danish for 15 minutes or overnight.

Bake the pastries for about 20 minutes, rotating the pan once during baking, until puffed and brown. Serve warm.

Tuesday, July 31, 2012

Fresh peach cake

Untitled

Right now, everything in my home is geared toward getting ready. We're getting ready for the arrival of baby sister - just 6 weeks from tomorrow. So, as you might expect, we're hauling out boxes of clothes from big sister (and chuckling at how tiny everything is), washing clothes, installing car seats, assembling strollers and swings and such... the list goes on. Add to that the fact that we are on week 3 of a major renovation of our master bathroom - which should be done in the next day or two so they can start on the laundry room. Then in 2 weeks the painter arrives. In between, we have house guests every weekend... Getting ready? I'm going to need a 3 month break after all of this!!!

But the change is certainly exciting. My first little girl has made the transition to her big girl bed and she's loving it. She points to her old crib and says "baby sister's" and this weekend she tole me baby sister is her best friend. In my state of pregnancy-hormone overload, I almost cried...

So how to deal with all this chaos? Why not bake a cake? I had a couple of overripe peaches and a couple perfect peaches so this cake was just the thing. Leave a comment with your favorite way to use the season's peaches...

Untitled

Fresh Peach Cake
adapted from How Easy Is That? by Ina Garten


1/4 pound (1 stick) unsalted butter, at room temperature
1 1/2 cups sugar, divided
2 extra-large eggs, at room temperature
1 cup sour cream, at room temperature
1 1/2 teaspoons pure vanilla extract
2 cups all-purpose flour
1 teaspoon baking soda
1 teaspoon baking powder
1/2 teaspoon kosher salt
2 teaspoons ground cinnamon
3 large, ripe peaches, peeled, pitted, and sliced
1/2 cup chopped pecans
Directions
Preheat the oven to 350 degrees F. Grease a 9-inch square baking pan.

In the bowl of an electric mixer fitted with the paddle attachment, beat the butter and 1 cup of the sugar for 3 to 5 minutes on medium-high speed, until light and fluffy. With the mixer on low, add the eggs, one at a time, then the sour cream and vanilla, and mix until the batter is smooth. In a separate bowl, sift together the flour, baking soda, baking powder, and salt. With the mixer on low, slowly add the dry ingredients to the batter and mix just until combined. In a small bowl, combine the remaining 1/2 cup sugar and the cinnamon.

Spread half of the batter evenly in the pan. Top with half of the peaches, then sprinkle with two-thirds of the sugar mixture. Spread the remaining batter on top, arrange the remaining peaches on top, and sprinkle with the remaining sugar mixture and the pecans.

Bake the cake for 45 to 55 minutes, until a toothpick inserted in the center comes out clean. Serve warm or at room temperature.


Tuesday, September 21, 2010

Morning Glory Muffins

DSC_0120

Many of my most loved recipes come from my mom. When we were kids she cooked for us all the time (she still does!) and we've come to love a lot of the dishes. We also love to recall some of the kitchen mishaps as I'm sure my family will one day do with my little blunders (I can't wait!). We never fail to laugh about the time she put cinnamon in tacos or how my older brother karate chopped her pumpkin roll as it rested on the counter.

These particular muffins made numerous appearances throughout our childhood, though none quite so amusing as a cinnamon taco. They're chock full of flavor with carrots, coconut, cinnamon and more. Plus, they stay moist for days.

On the day I made them, "Morning Glory" seemed the perfect name too. Up with Claire at 5, I saw the sun come up on what turned out to be a perfect September day. A few puffy white clouds speckled the sky, but the sun was bright and a cool breeze was blowing. Perfect weather for a warm muffin and a hot cappuccino on the deck.

Morning Glory Muffins
2 c. flour
¾ c. sugar
2 tsp. baking powder
2 tsp. cinnamon
½ tsp. baking soda
¼ tsp. salt
2 c. finely shredded carrot
1 c. finely chopped apple
½ c. currants or raisins
½ c. chopped walnuts
½ c. shredded coconut
3 eggs
¾ c. cooking oil
2 tsp. vanilla

Preheat oven to 350°.

Lightly grease 18 2 ½-inch muffin cups, or line them with paper bake cups.

In a large mixing bowl, stir together the flour, sugar, baking powder, cinnamon, baking soda, and salt. With a wooden spoon, stir in carrot, apple, currants, coconut, and walnuts.

In a separate bowl, stir together the eggs, cooking oil and vanilla. Add mixture all at once to flour mixture and stir only until moistened.

Gently spoon the batter into the prepared muffin cups until each one is almost full.

Bake for about 30 minutes or until the top of a muffin springs back when lightly touched. Cool in the pan set on a wire rack for 5 minutes. Remove muffins from pan and cool on the rack. Serve warm or at room temperature.

Make 18 muffins.

Friday, September 10, 2010

Is it a muffin or is it a doughnut?

DSC_0111

Now that I've adjusted (more or less) to rising in the wee hours when our wee one is hungry, I find that the early morning is a fabulous time to cook. My husband also seems pretty happy about it. Last weekend, Saturday morning found me up at 5:30. With the sun just rising and cool temperatures, it seemed like the perfect time to make muffins.

Often on Saturdays, we visit the local bakery in Scotch Plains: the Suisse Pastry Shop. They have the BEST old-fashioned glazed donuts and really good apple fritters, among countless other tasty delights. These muffins taste a bit like those donuts and they're super easy to make. I'm also hoping they're a bit healthier! Another benefit: they make your house smell almost as good as the pastry shop.

DSC_0095

Donut muffins
adapted from Williams-Sonoma Muffins

7 Tbsp. unsalted butter, at room temperature
2/3 cup sugar
1 large egg
1 1/2 cups all-purpose flour
1 1/2 tsp. baking powder
1/2 tsp. baking soda
1/2 tsp. salt
1/4 tsp. freshly grated nutmeg
1/2 cup buttermilk
1 1/2 tsp. vanilla extract

For the topping:
1/3 cup sugar
1 Tbsp. ground cinnamon
4 Tbsp. unsalted butter, melted

Preheat oven to 350F. Line 9 muffin cups with foil liners, or grease 9 of the cups.

Using an electric mixer on medium speed, cream together the butter and sugar. Add the egg and beat until pale and smooth.

In a separate bowl, stir together the flour, baking powder, baking soda, salt and nutmeg. Add half to the butter mixture, then add the buttermilk, combining well after each addition. Add the remaining flour mixture and stir until just evenly moistened - the batter will be lumpy.

Spoon into the muffin cups and bake for about 20-25 minutes. Remove from oven and let cool in pan for 5 minutes. Remove from pan and continue cooling until cool enough to handle.

To finish, stir together the cinnamon and sugar in a dish and melt the butter in a separate dish. Dip each muffin top in the butter then press it in the sugar.

Makes 9 muffins.

DSC_0086

Thursday, May 27, 2010

Breakfast tart with pancetta, green onions and two cheeses

breakfast-tart2

I have a thing for kitchen gadgets... but I find many of them useless once I get them home to try them out. A couple examples are a strawberry huller I was given - I have yet to find a strawberry big enough that this gizmo will work on and really, isn't a paring knife faster anyway?? Another is a spice toaster I found - looked really cool and I do toast a lot of spices, but it just doesn't work as well as a good old pan. On the other hand, the useful ones become indispensible in my kitchen; some examples: my citrus juicer, my silicone tongs and my silicone ball whisk. The ball whisk came in handy with this particular brunch recipe.

breakfast-tart (2)

When it comes to whisks, a traditional whisk is great for whisking liquids, but add any solids to it and things are forever getting stuck in it. Plus, a regular whisk just never seems to get all the corners of the bowl or pan. A silicone ball whisk will get into every part of the pan and the open bottom means that chunks won't get trapped within. This particular recipe has you whisk eggs, shredded cheese, mascarpone, scallions and more. A ball whisk is perfect for the job! Check out mroe recipes with the ball whisk and other gadgets in action on the Foodbuzz Daily Special.

This is a rich tart - it's cheesy and full of flavor from the pancetta and scallions. You could very easily substitue other fillings like chopped ham, bacon, prosciutto, chives, or other veggies. Make your own crust or use a store-bought one to save time. Plus, this can be made a day ahead and then reheated in the oven for an easy brunch.

breakfast-tart2 (2)

Breakfast tart with pancetta, green onions and two cheeses
adapted from the Food Network
  • Butter, for greasing the pan
  • Flour, for dusting the pan
  • Homemade crust ofr a 9-inch tart or 1 unroll-and-bake refrigerated 9-inch pie crust
  • 1 egg white, lightly beaten
  • 2 teaspoons vegetable oil
  • 3 ounces pancetta, cut into 1/4-inch pieces
  • 5 eggs, at room temperature, lightly beaten
  • 1/2 cup (4 ounces) mascarpone cheese, at room temperature
  • 2 cups (8 ounces) shredded Gruyere or Scamorza
  • 3 green onions, thinly sliced
  • 1/2 teaspoon kosher salt
  • 1/2 teaspoon freshly ground black pepper

breakfast-tart

Special equipment: 9-inch tart pan with removable base
Put an oven rack in the center of the oven. Preheat the oven to 400 degrees F. Butter and flour the bottom and sides of a 9-inch tart pan.
Arrange the pie crust in the prepared pan. Gently press the crust into the bottom and sides of the pan. Trim any excess crust from the top of the pan. With the tines of a fork, prick the pastry in several places. Using a pastry brush, coat the crust with the beaten egg white. Put the pan on a baking sheet and bake until the egg white has set, about 10 minutes. Allow the crust to cool for 10 minutes.
In a medium skillet, heat the oil over medium-high heat. Add the pancetta and cook, stirring frequently, until brown and crispy, about 6 to 8 minutes. Drain on a paper towel lined plate.
In a medium bowl, whisk the beaten eggs, mascarpone cheese, Gruyere, green onions, salt, pepper, and pancetta. Mix until smooth. Pour the mixture into the cooled crust and bake until the mixture has set and the top is golden, about 18 minutes Cool the tart for 10 to 15 minutes then remove it from the pan to a serving platter.
Cut the tart into wedges and serve warm or at room temperature.

Tuesday, May 25, 2010

Cinnamon Walnut Scones: Just sweet enough

cinnamon-walnut-scones (2)

For me, houseguests are an opportunity to try new recipes. I like to make some sort of breakfast item so that early risers have something to nibble if they get up before I make it downstairs. I saw a post for pecan cinnamon scones on Foodbuzz a couple weeks ago and I saved it. The arrival of my husband's sister and her husband provided the perfect excuse to whip up a batch. These scones have a touch of sweetness, but they're not as sweet as coffee cake. I've been enjoying the leftovers for the past two days with my morning coffee. I set out my ingredients the night before and they came together quickly in the morning. The house was filled with the pleasant scent of cinnamon - what's better in the morning???

cinnamon-walnut-scones-1

We have more houseguests arriving next weekend so I'll have to start sifting through more recipes... Work for some, a fun way to spend an evening for me. (It's kind of a sickness isn't it? Surrounded by stacks of cookbooks, searching tirelessly for the perfect recipe...) If you want to help save me some time, leave a comment with a recipe idea or a link back to one of your favorites. Maybe I'll give it a try for my in-laws next week.

I should note I had way too much topping so consider cutting that down. I made the full batch and will find something else to make with it in the next day or so...

cinnamon-walnut-scones-1

Cinnamon Walnut Scones with Streusel Topping
adapted from a post on Daydreamer Desserts

Cinnamon-Walnut Streusel

3/4 cup unsifted bleached all-purpose flour
1/2 teaspoon ground cinnamon
1/3 cup plus 3 tablespoons firmly packed light brown sugar, sieved if lumpy
pinch of salt
6 tablespoons (3/4 stick) unsalted butter, cold, cut into chunks
3/4 teaspoon pure vanilla extract
1 cup chopped walnuts

Thoroughly combine the flour, cinnamon, light brown sugar, and salt in a medium-size mixing bowl.

Scatter over the butter chunks and drizzle over the vanilla extract. Using a pastry blender or two round-bladed table knives, cut the butter into the flour-sugar mixture until reduced to marble-size bits.

Scatter over the chopped pecans and mix them in.

With your fingertips work the mixture util moist clumps of streusel are formed, pressing and crumbling it into large and small lumps.

cinnamon-walnut-scones

Cinnamon Walnut Scone Dough

3 cups plus 2 tablespoons unsifted bleached all-purpose flour
3 1/2 teaspoons baking powder
1/8 teaspoon cream of tartar
1/2 teaspoon salt
1 1/2 teaspoons ground cinnamon
1/4 teaspoon freshly grated nutmeg
1/3 cup plus 1 tablespoon granulated sugar
1/4 pound (8 tablespoons or 1 stick) unsalted butter, cold, cut into chunks
1 cup chopped walnuts
2/3 cup heavy cream
2 large eggs
2 1/2 teaspoons pure vanilla extract

Preheat oven to 400F.

Whisk the flour, baking powder, cream of tartar, salt, cinnamon, nutmeg, and granulated sugar in a large mixing bowl. Drop in the chunks of butter. Using a pastry blender or two round-bladed table knives, cut the fat into the flour until reduced to small nuggets. Further crumble the mixture between your fingertips for 30 seconds to 1 minute.

Mix in the chopped walnuts.

Whisk the heavy cream, eggs, and vanilla extract in a medium-sized mixing bowl. Pour the liquid ingredients over the flour mixture and combine to form the beginnings of a dough, using a sturdy wooden spoon or flat wooden spatula.

Knead the dough together in the bowl with your hands until it forms a firm dough, 1 to 2 minutes. If the dough is too dry you can add an additional tablespoon of heavy cream.

Turn out the dough onto a very lightly floured work surface, divide in half, and pat each piece into a 6 - 6 1/2 inch round cake. With a chef's knife, cut each cake into five wedges.

Press some of the streusel topping on top of each triangle of dough, patty it down with your fingertips or the palm of your hand, dividing the topping evenly among all of the scones. Use all of the topping.

Place the scones on parchment or silpat lined cookie sheets, spacing them about 3 1/2 inches apart. Arrange five scones on each sheet.

Bake the scones for 15 - 17 minutes, or until risen and set.

Transfer the scones to cooling racks, using a wide, offset metal spatula. Serve warm or at room temperature.

Monday, April 19, 2010

Chunky Banana Bran Muffins

banana-muffins (3)

I hate wasting things so when I have leftover bananas that are overripe, they have to find their way into some sort of baked good. These chunky muffins are perfect: they use up any leftover bananas I have around the house and they're loaded with bran, nuts, raisins and all sorts of good stuff. The banana keeps them moist for a few days so they're great for breakfast on the go.

What's your favorite recipe to use up extra fruit you have around? Leave a comment and let me know!

Chunky Banana Bran Muffins

1 ½ c. bran flakes
3 medium ripe bananas, mashed with a fork
½ c. milk
1 egg
3 Tbsp. vegetable oil
1/2 c. all purpose flour
½ cup whole wheat flour
¼ c. sugar
2 tsp. baking powder
¼ tsp. baking soda
¾ tsp. ground cinnamon
pinch nutmeg
½ c. raisins (optional)
1/3 c. chopped walnuts, pecans or almonds (optional)

Preheat oven to 400°.

Grease or line 12 muffin cups.

banana-muffins

Combine cereal, banana, milk, egg and oil in a bowl and mix well. Let stand 5 minutes; stir to break up cereal. Add flour, sugar, baking soda, baking powder, cinnamon and nutmeg. Stir until just mixed. Stir in nuts and raisins.

Divide evenly among prepared baking cups. Bake 20 minutes or until a tester inserted in center comes out clean.

Makes 12.

Wednesday, March 3, 2010

Recipe from a friend: Artichoke Pie

artichoke-pie (6)

Last week, I ended up having numerous work functions for people who were leaving the business or retiring. All of them centered around food (of course!) One of the best things about it was seeing friends and co-workers I don't see everyday. I got a chance to catch up with my friend Patty; she's a fellow foodie so we always have plenty to talk about. When I first moved, Patty told me about local restaurants, grocery stores, bake shops and more. Lately, we share stories about the dishes we make. It was during one of those conversations last week that she mentioned her Artichoke Pie.

The recipe is simple, especially if you use store-bought pie crust. It's kind of like a quiche, but without the cream. I made it fresh this morning (a benefit of rising at 6 a.m.) and had a slice for lunch. I'll be nibbling more of it later in the week, maybe with a side salad - I'm thinking baby spinach with a little fresh squeezed lemon juice, olive oil, salt and pepper.

I modified the original recipe slightly. I added the sauteed shallot and a pinch of cayenne. I may have also been a little liberal when measuring the Romano cheese! This is a great dish for brunch or lunch. It'd reheat superbly for a buffet. I also think it could easily be modified. Next time, I might try feta or Paremsan cheese just for a little change. You could also add a little chopped ham or bacon to bring in another layer of flavor... the possibilities are endless.

artichoke-pie (5)
Artichoke Pie
  • 1 shallot, diced
  • 2 cans of artichoke hearts in water (or 10 oz frozen artichoke hearts – thawed), quartered
  • 1 minced garlic clove or ¼ tsp garlic powder
  • 3 eggs lightly beaten
  • ¼ cup grated Italian cheese (Locatelli or Pecorino)
  • 8 oz shredded whole milk mozzarella
  • Salt and Pepper to taste
  • Pinch of cayenne (optional)
  • 2 tbsp olive oil
  • 9 inch Pie Crust (store bought or homemade)

artichoke-pie (2)

Preheat oven to 350F. Line 9" pie plate with crust.
Saute the shallot and artichoke hearts in 2 tbsp olive oil for about 5-6 minutes or until golden brown. Cool slightly.

artichoke-pie (1)

Combine remaining ingredients in bowl and add sautéed artichokes.

Spread evenly into 9” pie crust. Bake for about 1 hour, until golden brown on top.

artichoke-pie (4)

Thursday, May 28, 2009

May Daring Bakers Challenge: Apple Strudel

The May Daring Bakers’ challenge was hosted by Linda of make life sweeter! and Courtney of Coco Cooks. They chose Apple Strudel from the recipe book Kaffeehaus: Exquisite Desserts from the Classic Cafés of Vienna, Budapest and Prague by Rick Rodgers.

(photos coming soon)

I must admit I struggled with this one... If you give it a try, be sure the dough gets super thin or it'll come out like mine did - a little tough. All in all it was a fun recipe to try and I'd certainly give it another go, especially since my first wasn't a huge success!

Preparation timeTotal: 2 hours 15 minutes – 3 hours 30 minutes
15-20 min to make dough
30-90 min to let dough rest/to prepare the filling
20-30 min to roll out and stretch dough
10 min to fill and roll dough30 min to bake
30 min to cool


Apple strudelfrom “Kaffeehaus – Exquisite Desserts from the Classic Cafés of Vienna, Budapest and Prague” by Rick Rodgers

2 tablespoons (30 ml) golden rum

3 tablespoons (45 ml) raisins
1/4 teaspoon ground cinnamon
1/3 cup plus 1 tablespoon (80 g) sugar
1/2 cup (1 stick / 115 g) unsalted butter, melted, divided
1 1/2 cups (350 ml) fresh bread crumbsstrudel dough (recipe below)
1/2 cup (120 ml, about 60 g) coarsely chopped walnuts
2 pounds (900 g) tart cooking apples, peeled, cored and cut into ¼ inch-thick slices (use apples that hold their shape during baking)

1. Mix the rum and raisins in a bowl. Mix the cinnamon and sugar in another bowl.
2. Heat 3 tablespoons of the butter in a large skillet over medium-high. Add the breadcrumbs and cook whilst stirring until golden and toasted. This will take about 3 minutes. Let it cool completely.
3. Put the rack in the upper third of the oven and preheat the oven to 400°F (200°C). Line a large baking sheet with baking paper (parchment paper). Make the strudel dough as described below. Spread about 3 tablespoons of the remaining melted butter over the dough using your hands (a bristle brush could tear the dough, you could use a special feather pastry brush instead of your hands). Sprinkle the buttered dough with the bread crumbs. Spread the walnuts about 3 inches (8 cm) from the short edge of the dough in a 6-inch-(15cm)-wide strip. Mix the apples with the raisins (including the rum), and the cinnamon sugar. Spread the mixture over the walnuts.
4. Fold the short end of the dough onto the filling. Lift the tablecloth at the short end of the dough so that the strudel rolls onto itself. Transfer the strudel to the prepared baking sheet by lifting it. Curve it into a horseshoe to fit. Tuck the ends under the strudel. Brush the top with the remaining melted butter.
5. Bake the strudel for about 30 minutes or until it is deep golden brown. Cool for at least 30 minutes before slicing. Use a serrated knife and serve either warm or at room temperature. It is best on the day it is baked.


Strudel doughfrom “Kaffeehaus – Exquisite Desserts from the Classic Cafés of Vienna, Budapest and Prague” by Rick Rodgers

1 1/3 cups (200 g) unbleached flour
1/8 teaspoon salt7 tablespoons (105 ml) water, plus more if needed
2 tablespoons (30 ml) vegetable oil, plus additional for coating the dough
1/2 teaspoon cider vinegar

1. Combine the flour and salt in a stand-mixer fitted with the paddle attachment. Mix the water, oil and vinegar in a measuring cup. Add the water/oil mixture to the flour with the mixer on low speed. You will get a soft dough. Make sure it is not too dry, add a little more water if necessary.Take the dough out of the mixer. Change to the dough hook. Put the dough ball back in the mixer. Let the dough knead on medium until you get a soft dough ball with a somewhat rough surface.
2. Take the dough out of the mixer and continue kneading by hand on an unfloured work surface. Knead for about 2 minutes. Pick up the dough and throw it down hard onto your working surface occasionally.Shape the dough into a ball and transfer it to a plate. Oil the top of the dough ball lightly. Cover the ball tightly with plastic wrap. Allow to stand for 30-90 minutes (longer is better).
3. It would be best if you have a work area that you can walk around on all sides like a 36 inch (90 cm) round table or a work surface of 23 x 38 inches (60 x 100 cm). Cover your working area with table cloth, dust it with flour and rub it into the fabric. Put your dough ball in the middle and roll it out as much as you can.Pick the dough up by holding it by an edge. This way the weight of the dough and gravity can help stretching it as it hangs. Using the back of your hands to gently stretch and pull the dough. You can use your forearms to support it.
4. The dough will become too large to hold. Put it on your work surface. Leave the thicker edge of the dough to hang over the edge of the table. Place your hands underneath the dough and stretch and pull the dough thinner using the backs of your hands. Stretch and pull the dough until it's about 2 feet (60 cm) wide and 3 feet (90 cm) long, it will be tissue-thin by this time. Cut away the thick dough around the edges with scissors. The dough is now ready to be filled.

Monday, November 10, 2008

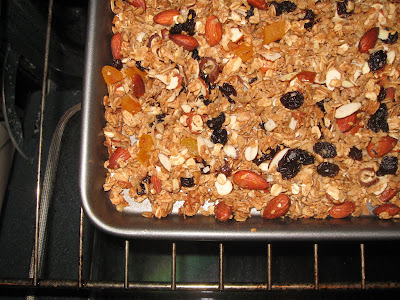
Granola for Tracy

We had family and friends visit from Canada this weekend. It was a busy one: into the City, shopping, cooking, out to dinner... I promised Tracy the recipe for granola and just ran out of time to write it down. So here you go Tracy, you guys should be pulling into Petrolia right about now!


Cinnamon Almond granola
(or really whatever kind you want)


2 1/2 cups old fashioned oats
1 cup coconut
1/2 cup shelled sunflower or pumpkin seeds (unsalted)
1/4 cup flax seed, optional
1 cup whole unsalted almonds (or any nuts you like)
1 tsp ground cinnamon
1 cup brown sugar
1/4 cup water
3 Tbsp. vegetable oil
1 tsp vanilla extract or vanilla bean paste
1/4 tsp. almond extract (optional)
1 cup dried fruit of your choice (cranberries, raisins, dates, apricots, currants...)

Preheat oven to 325 and spray a large baking sheet with cooking spray.

In a large bowl, combine the oats, nuts, flax seed if using, coconut, sunflower or pumpkin seeds and cinnamon. Toss to mix evenly.

In a small pan, combine sugar, vanilla, water, oil, and almond extract. Bring to a boil. Pour over oat mixture and stir until evenly combined. Spread mixture evenly on baking sheet and bake for 15 minutes. Stir to break it apart and then bake another 12 minutes. Add the fruit and bake about 10 minutes more or until it starts to get a bit darker but not burned. Allow to cool completely on baking sheet and store in an airtight container.

Great over vanilla yogurt or with milk!
Related Posts with Thumbnails